
3. Get your first NFT
1. Visit an NFT Marketplace
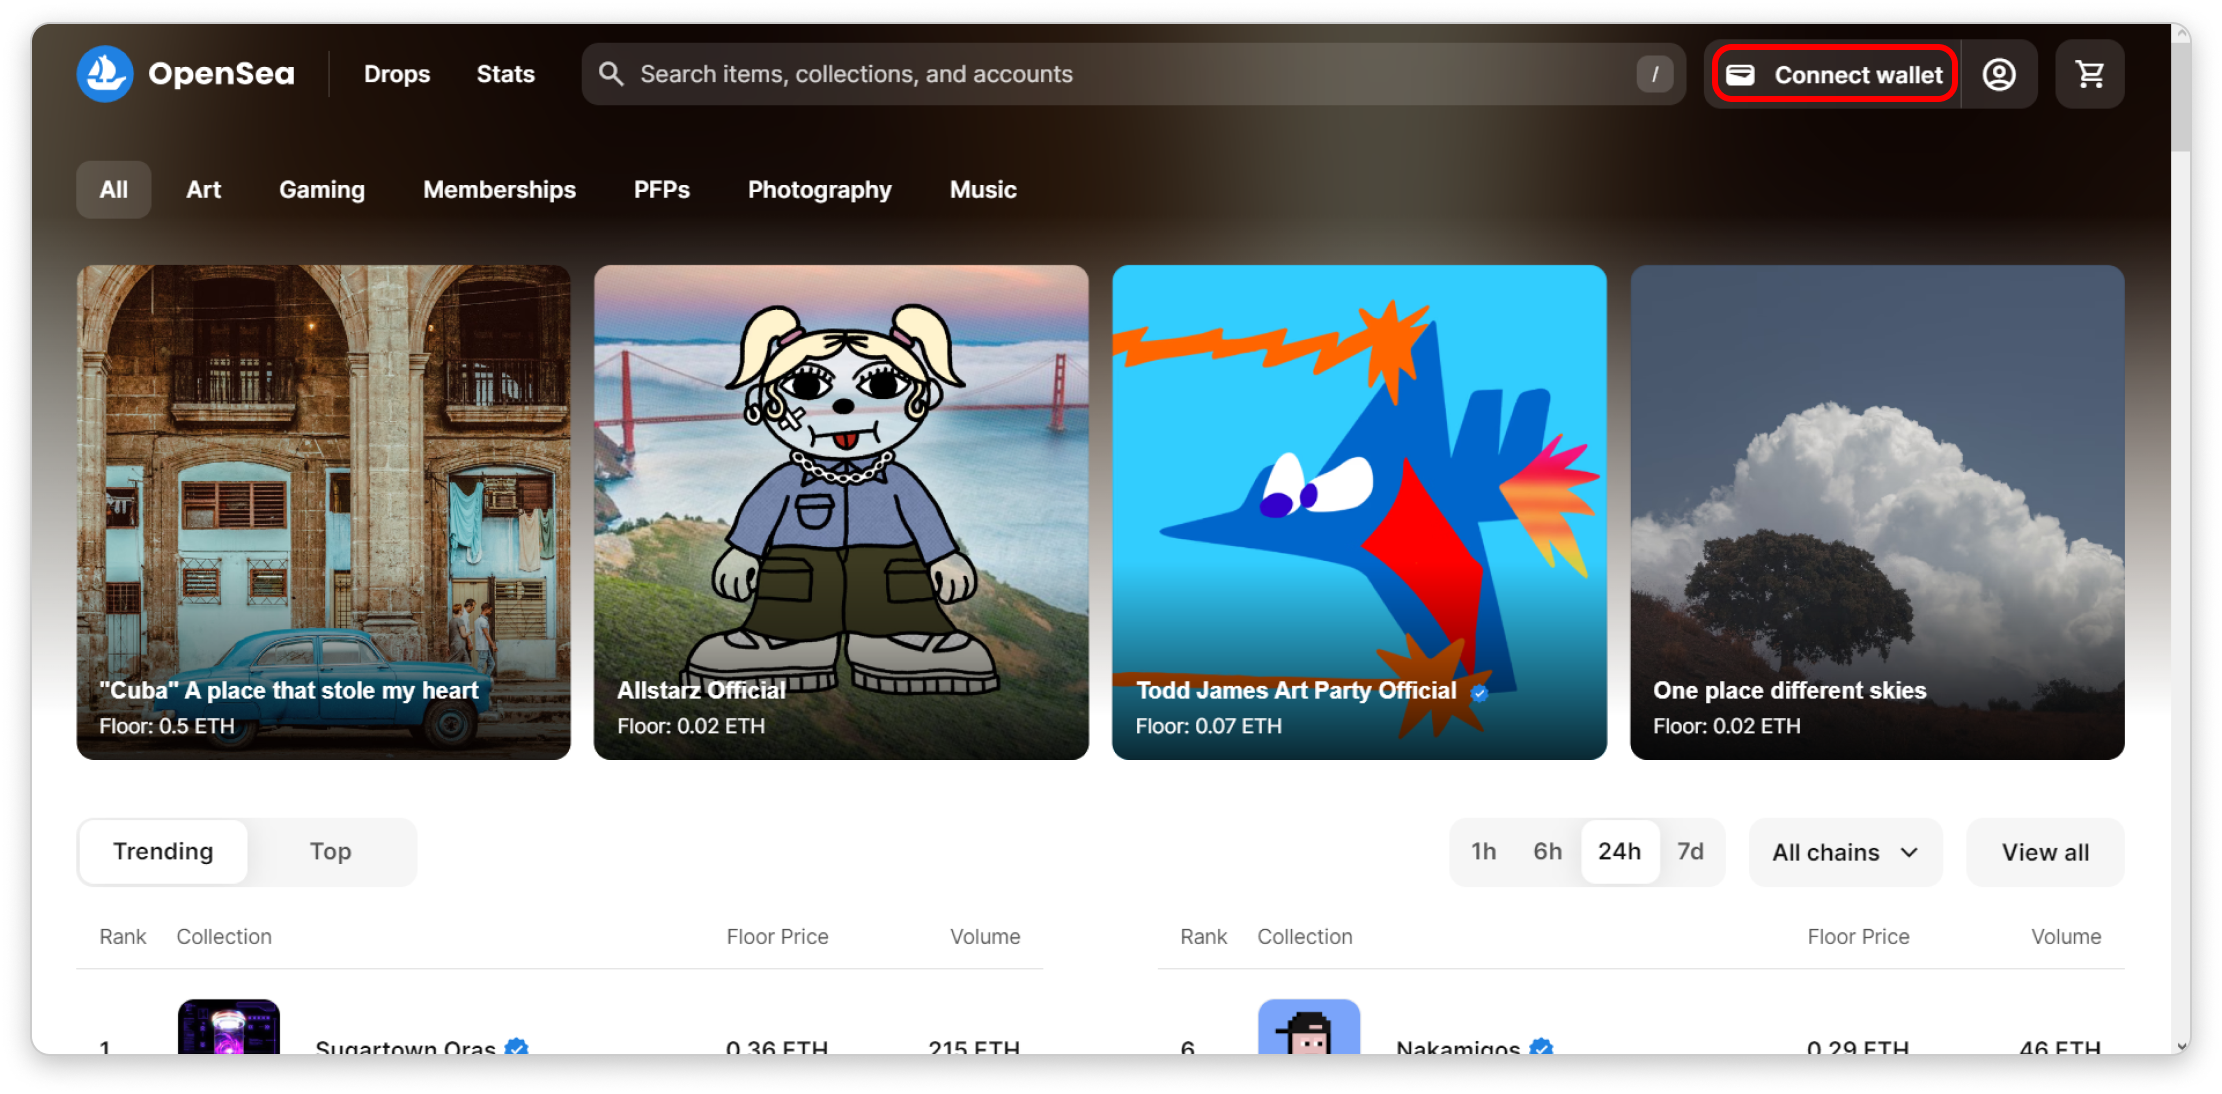
Before using any dApp, you must connect your wallet to perform transactions.
To do this, simply click on the Connect Wallet button located at the top right corner of OpenSea website.
Once clicked, you will be prompted to select a wallet. If you followed our first tutorial, you should already have a MetaMask Wallet.
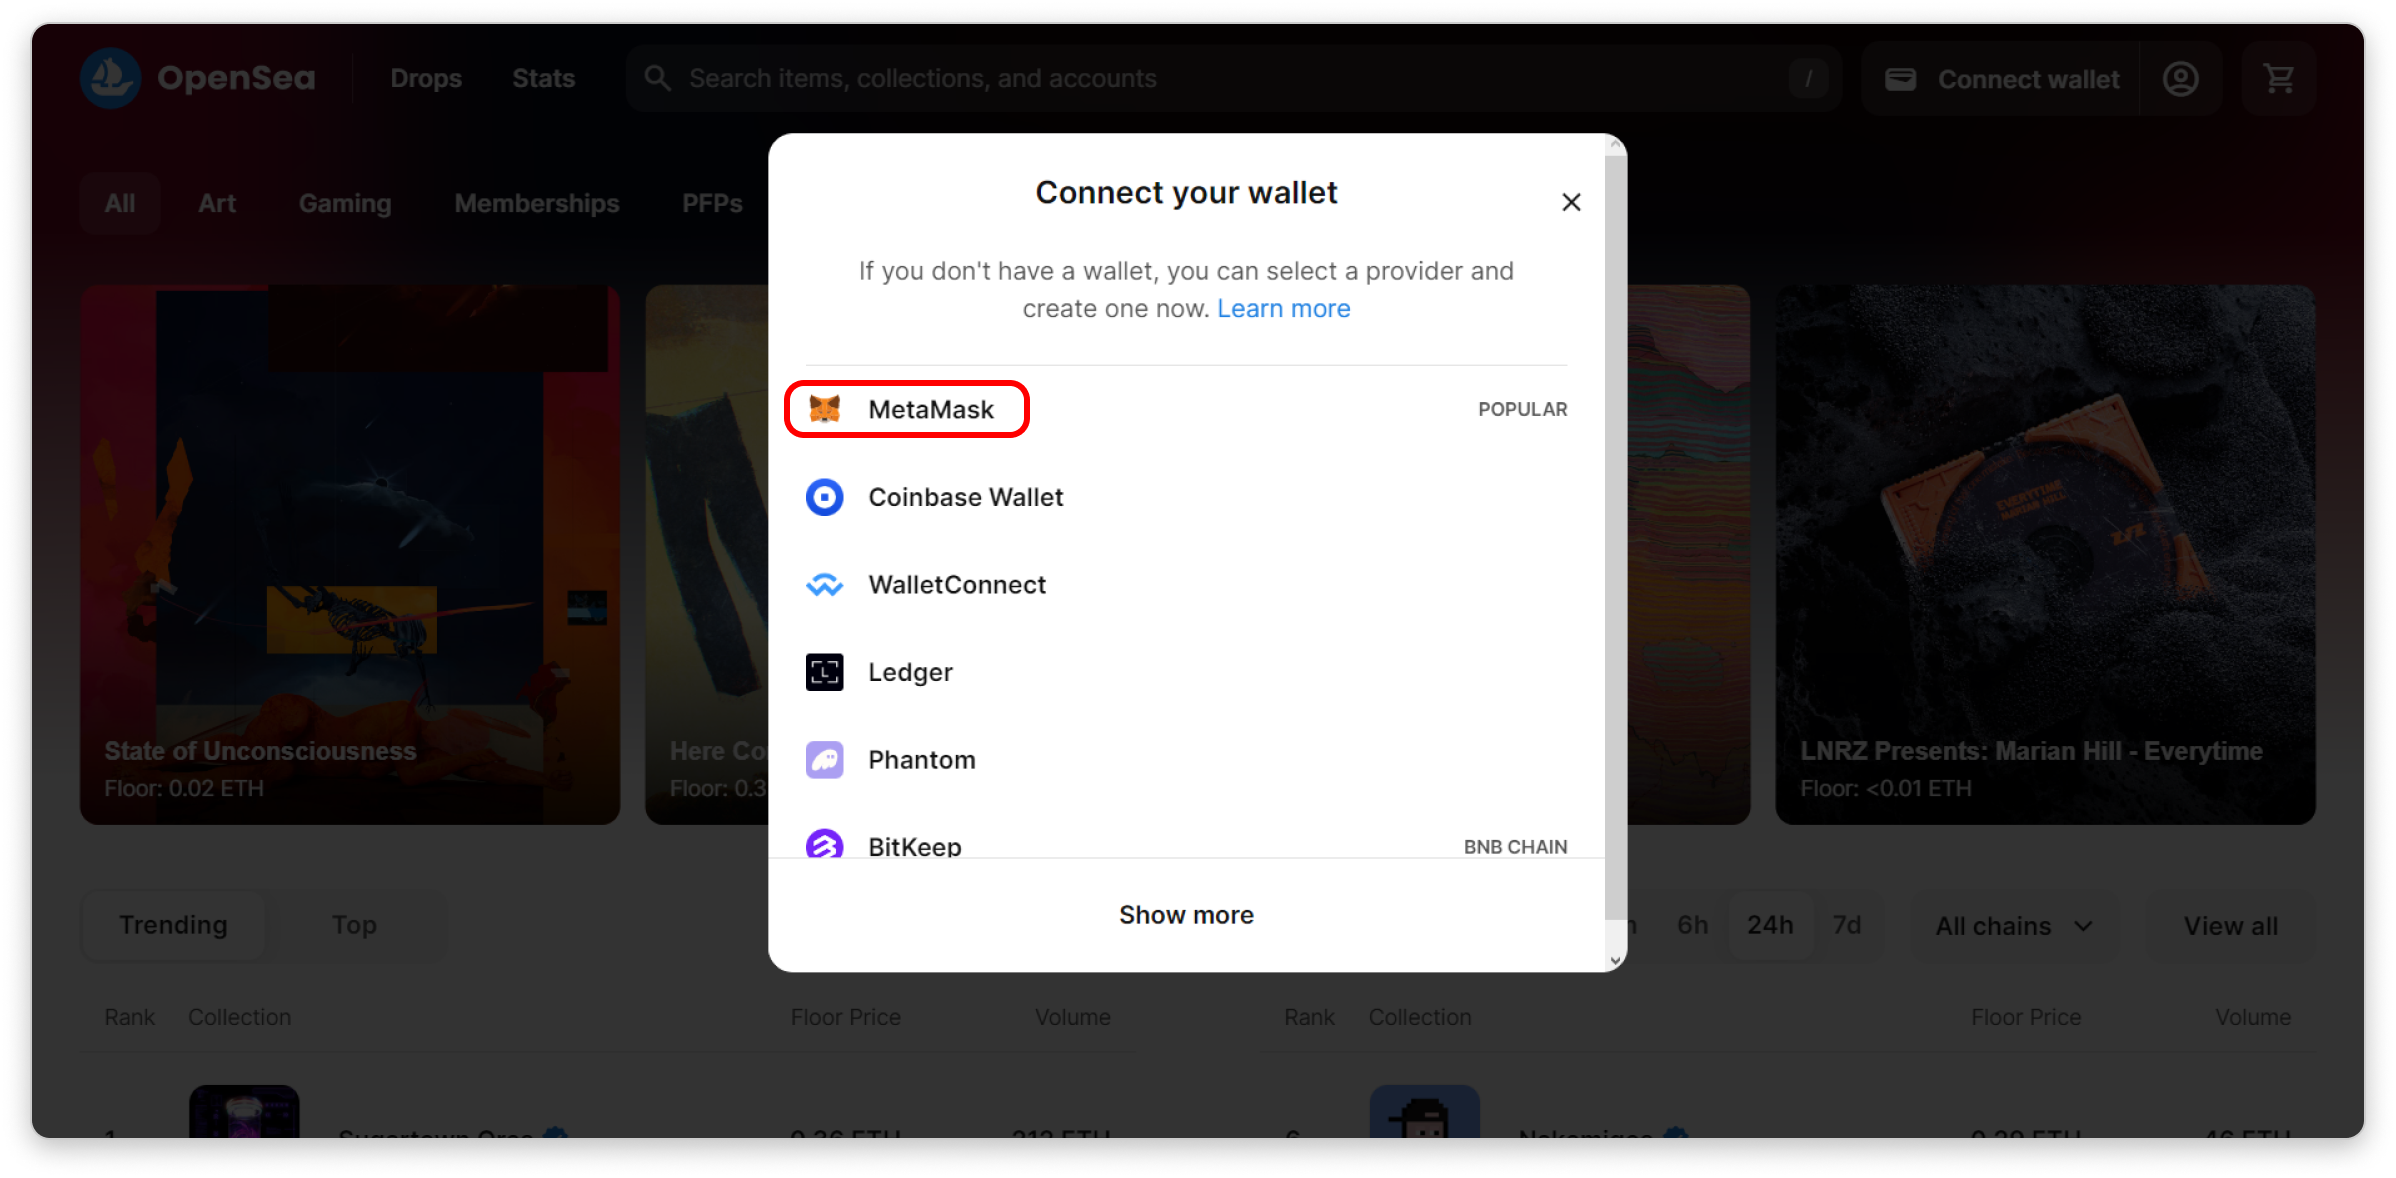
Connect your wallet.
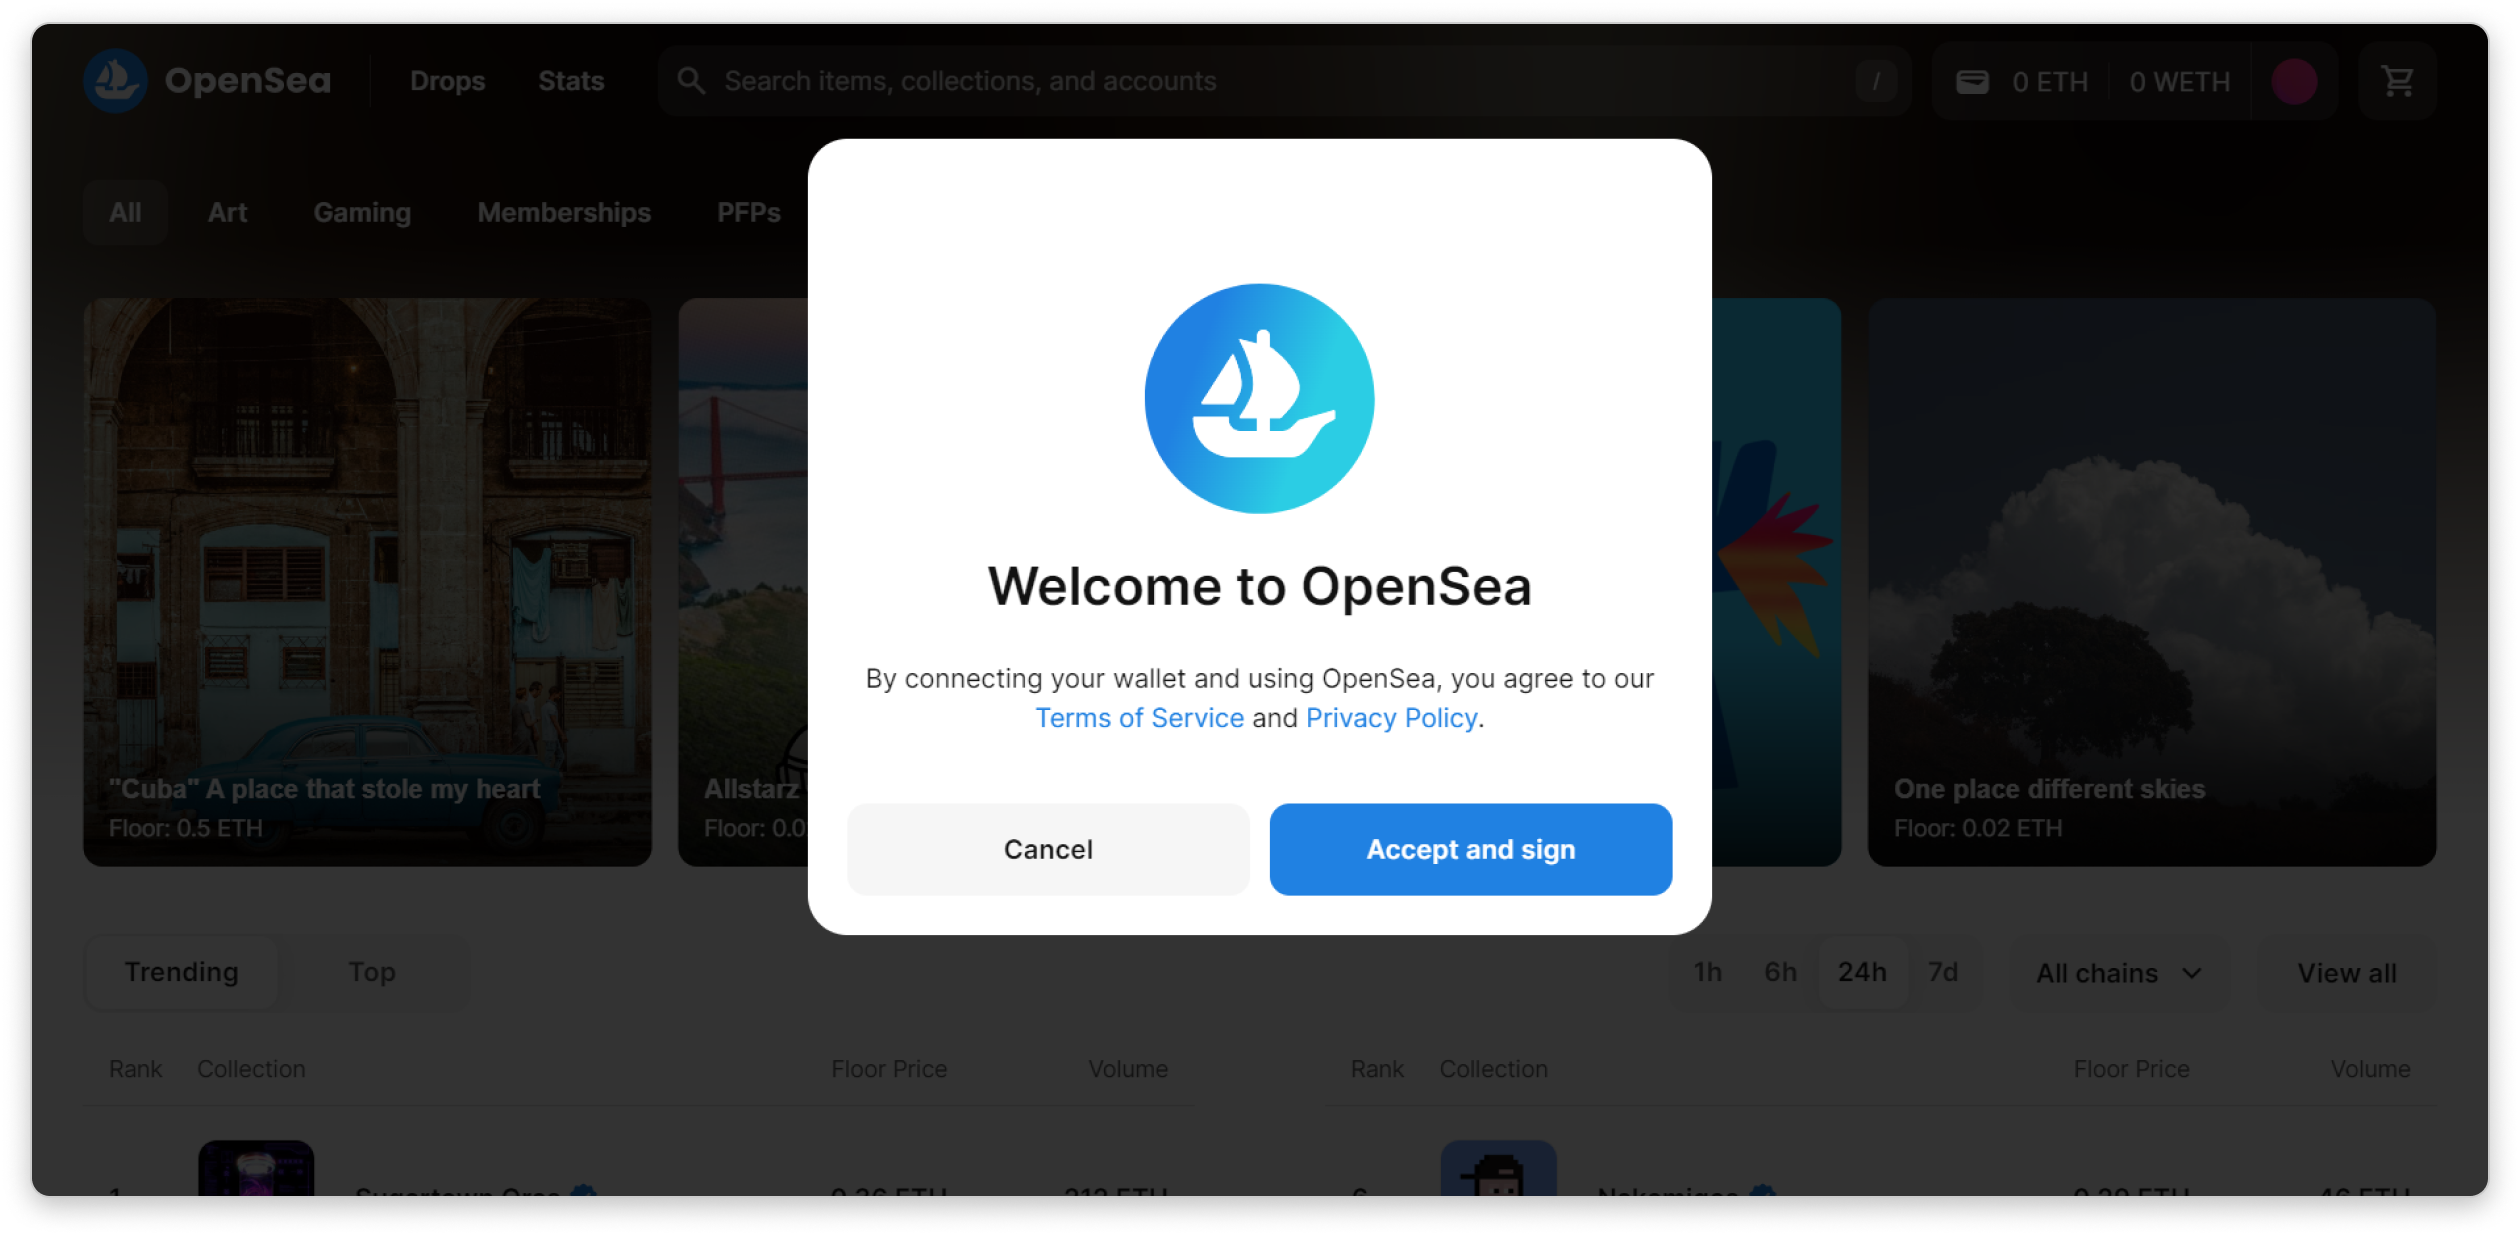
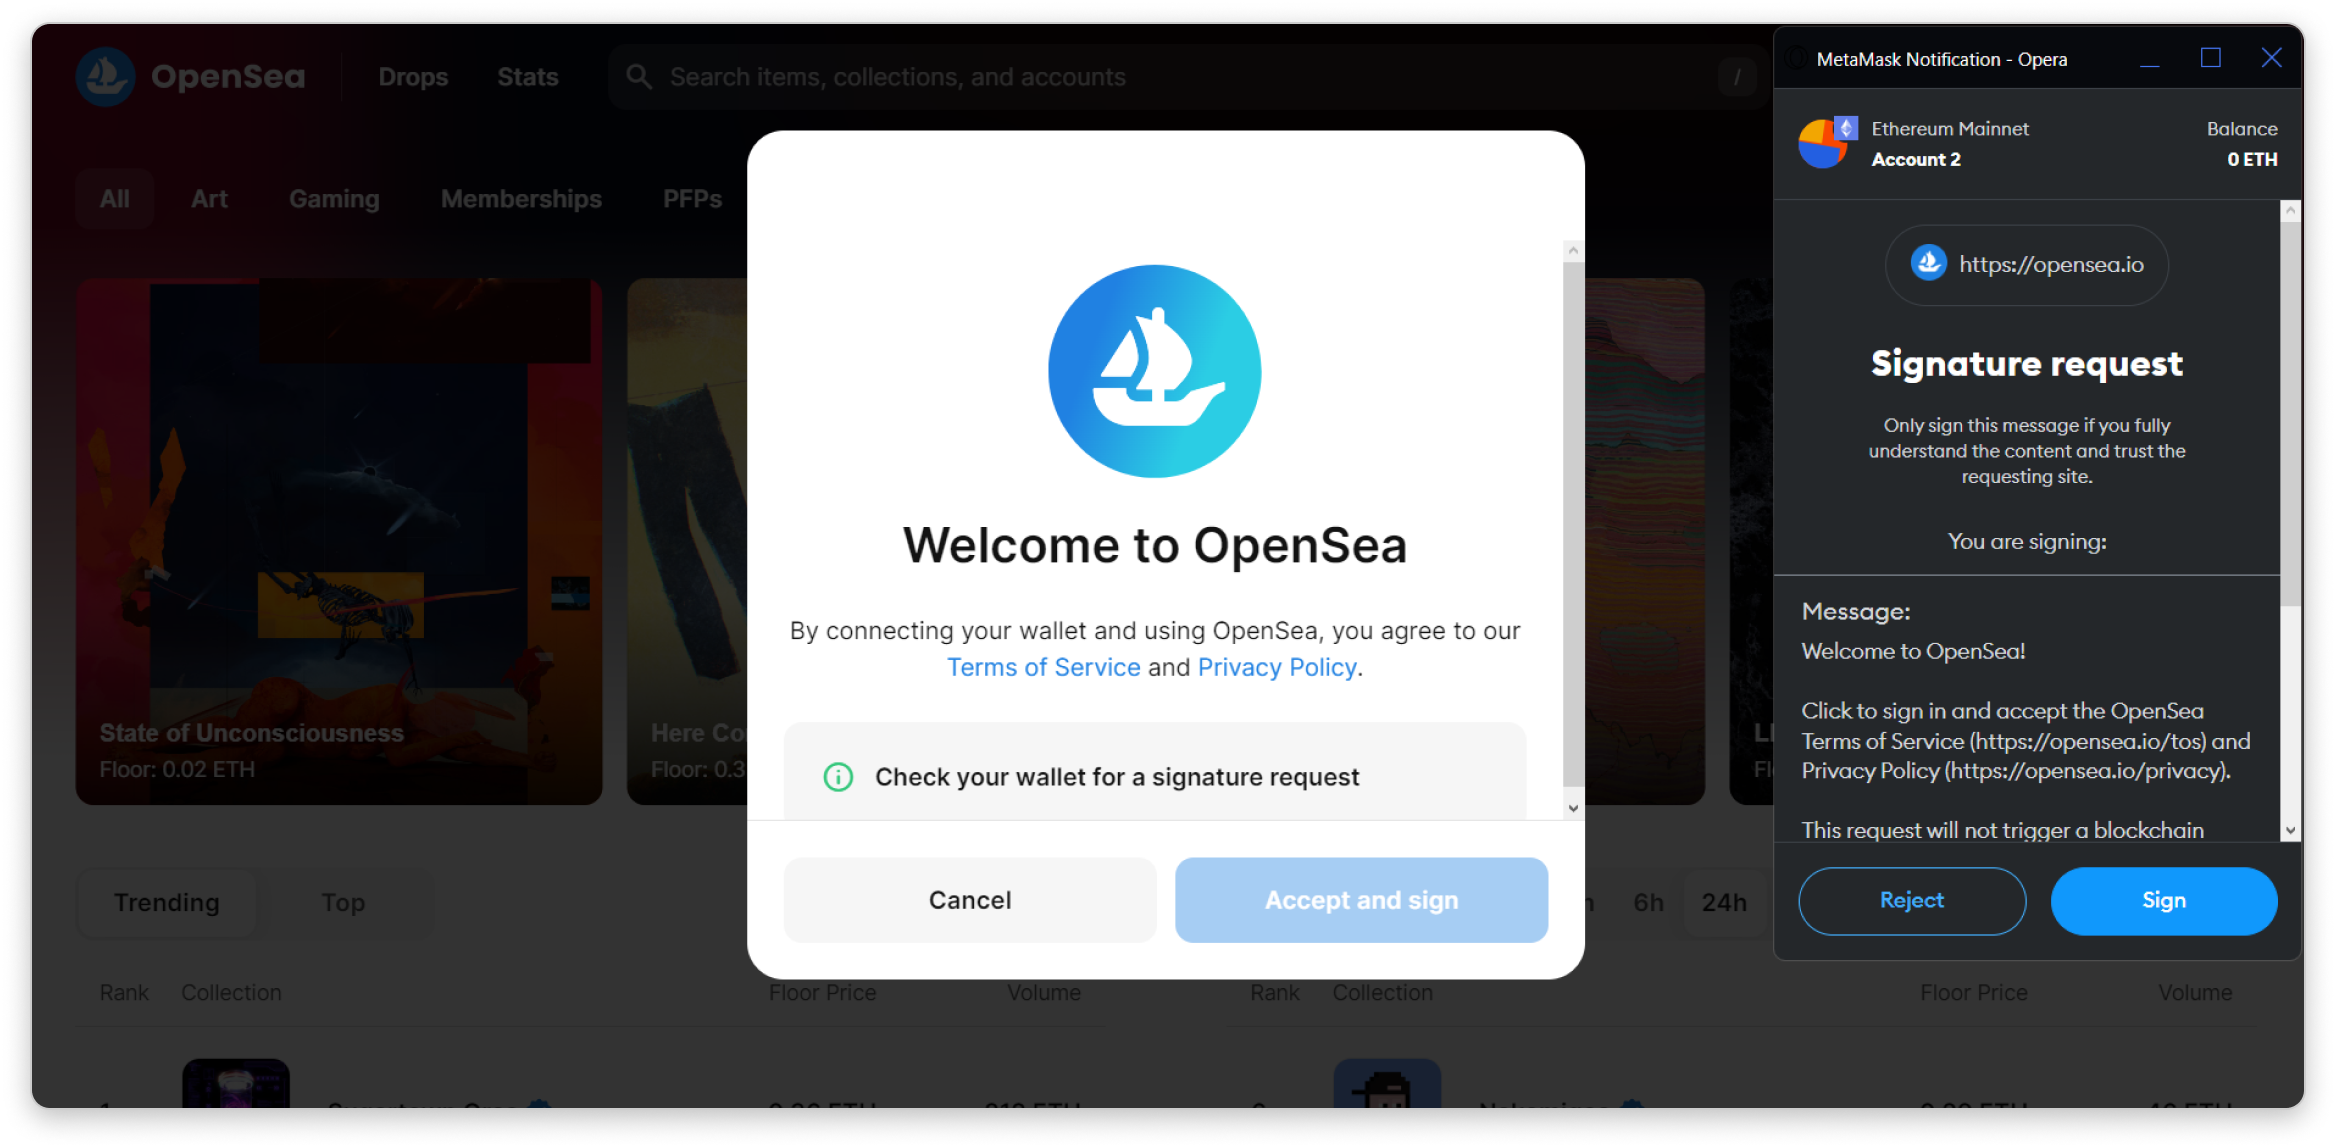
OpenSea will ask you to review their Terms of Service and Privacy Policy.
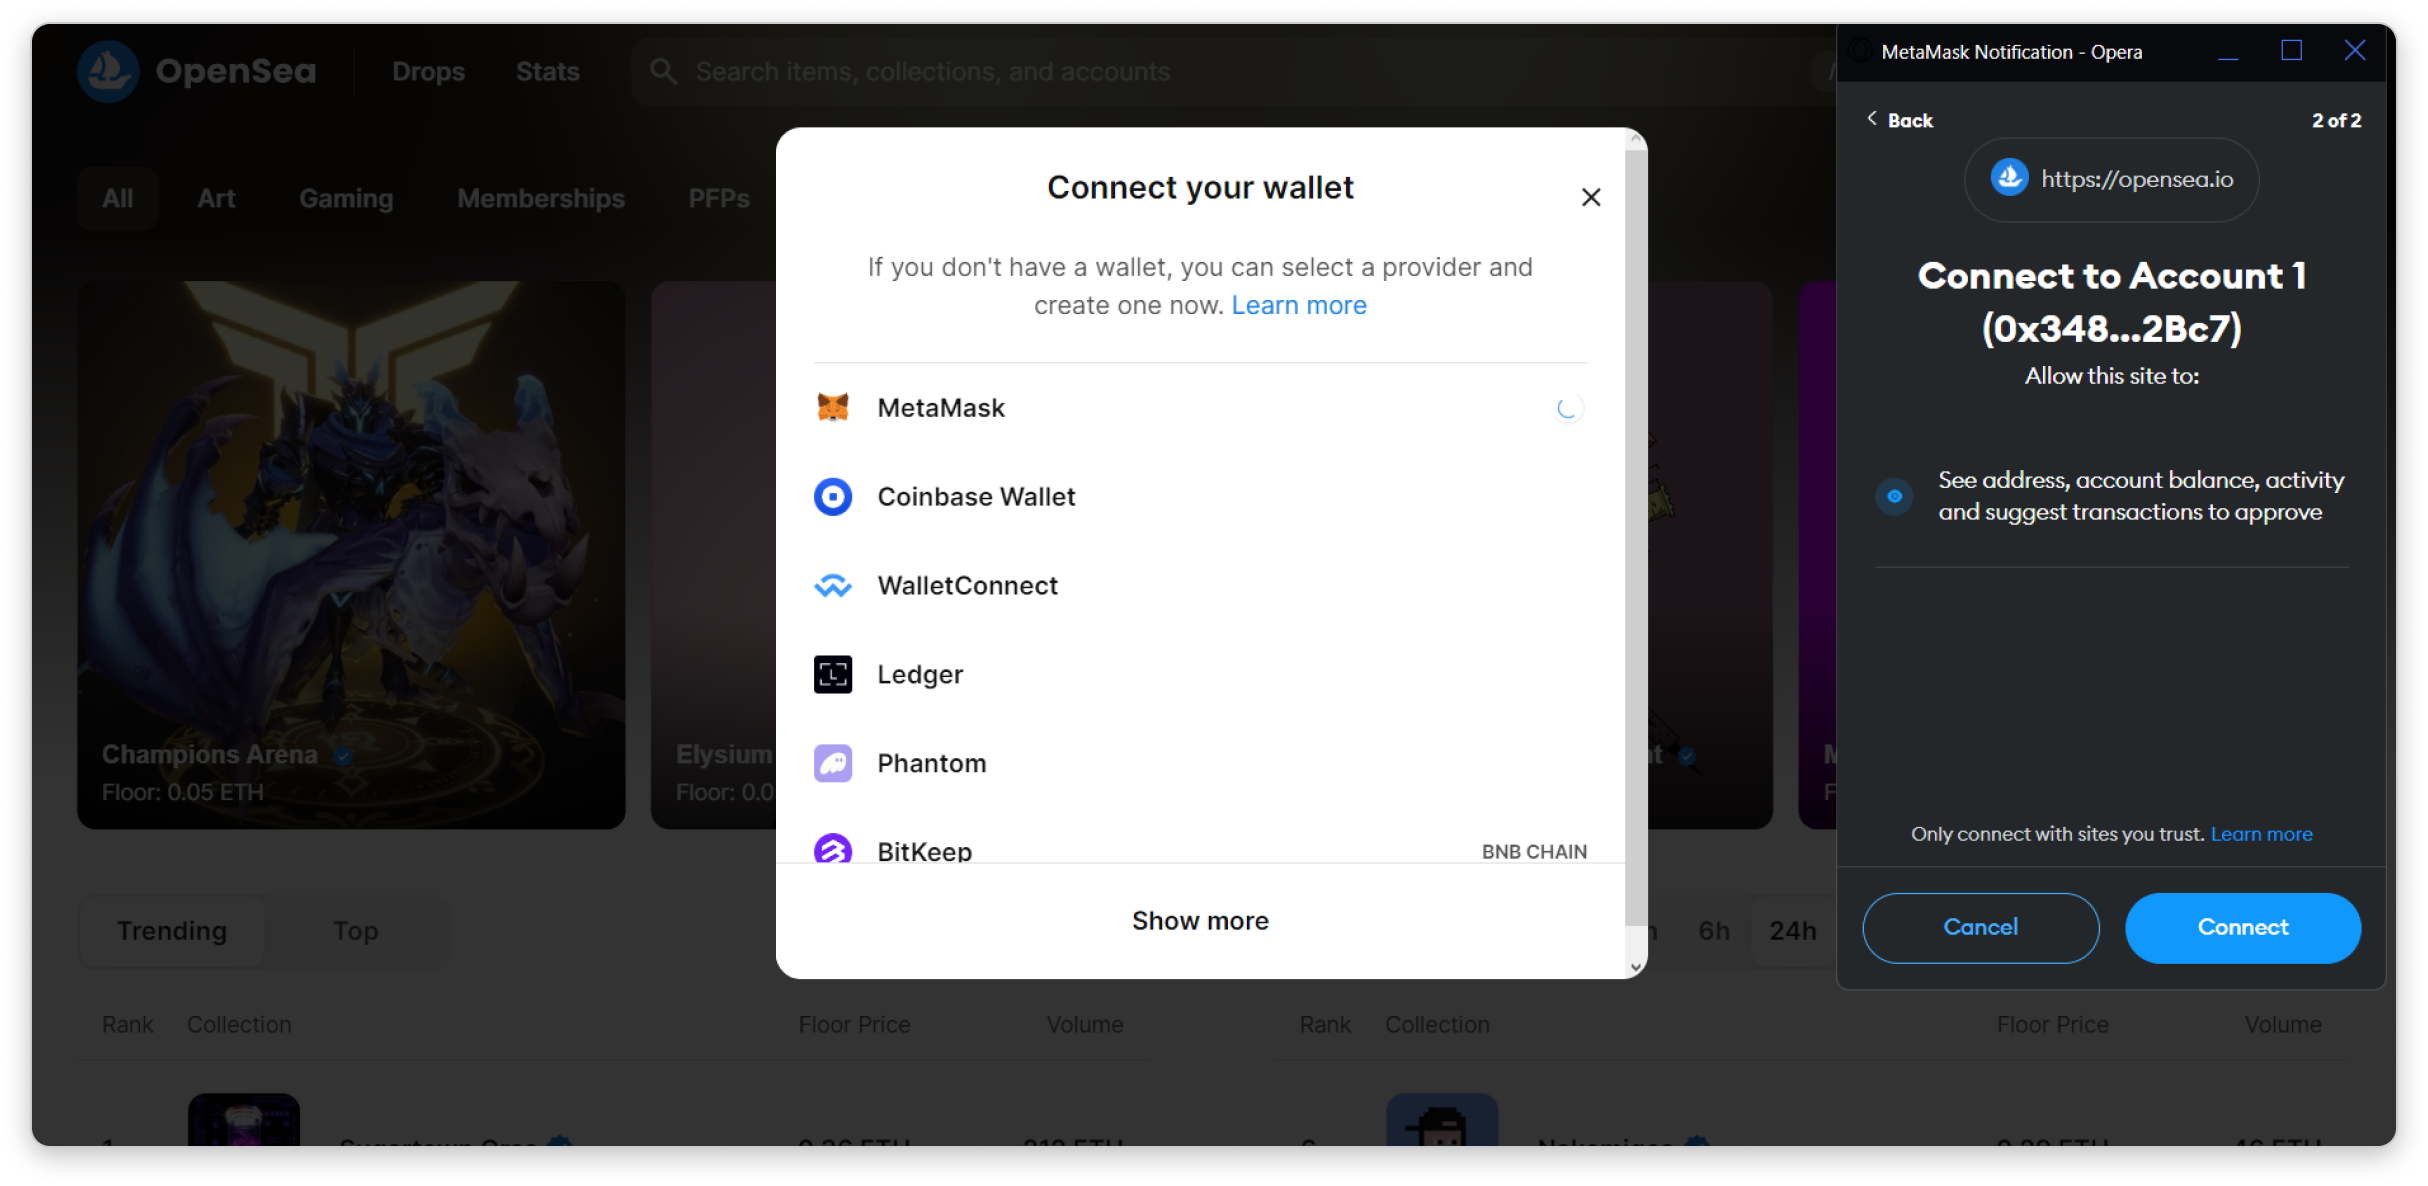
Next, you will be asked to sign in using your MetaMask. This step should not trigger any blockchain transaction, and you're all set.
Once you are logged in, you should see your wallet balance and your 'avatar' in the top right section, as shown in the screenshot below.

2. Choose and Buy an NFT
Since we are focusing on learning to buy NFTs, we will start with the most affordable option available in the market. To do so, simply click on this link, which is filtered to display the cheapest NFTs on Ethereum.
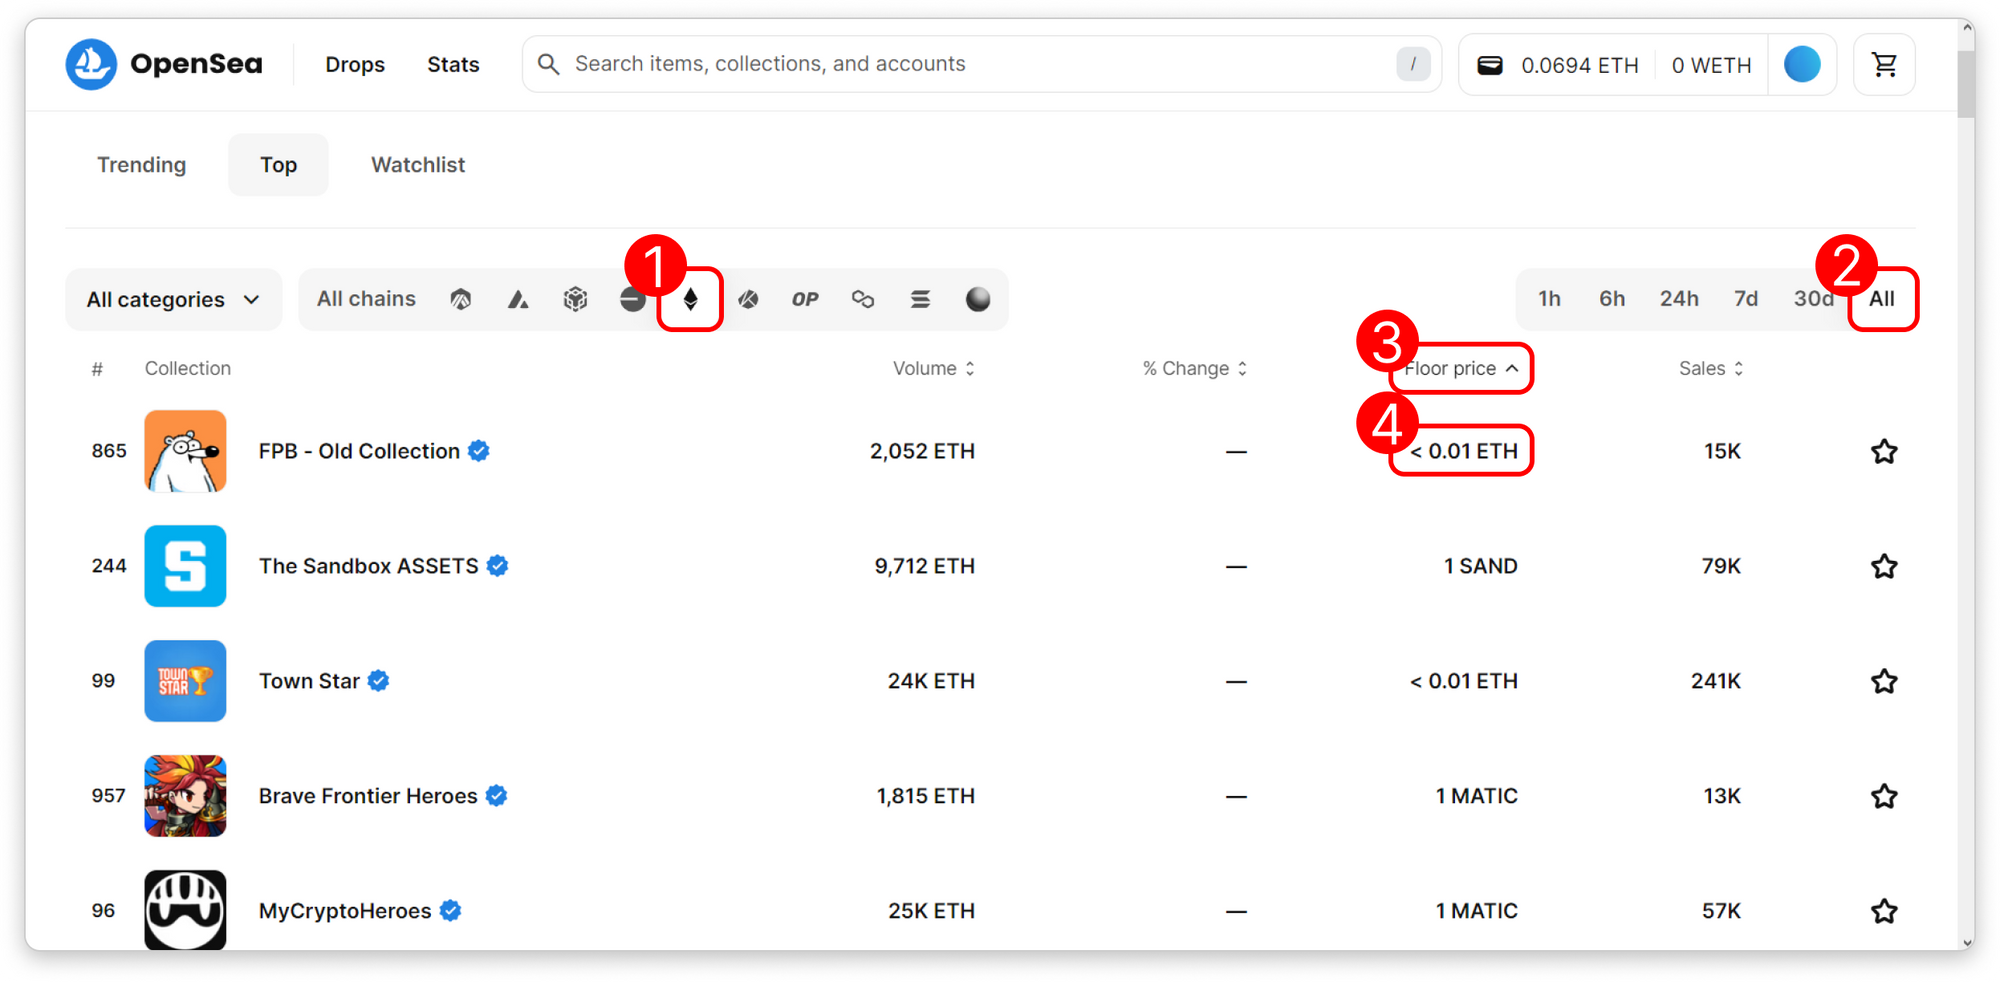
In this filter:
- We filter for NFTs on Ethereum.
- We filter for 'All Time' to find the most affordable NFTs ever listed.
- 'Floor Price' represents the current lowest listing price.
- Assuming you only have ETH in your wallet, focus on listings in ETH currency.
For this example, we've chosen FPB - Old Collection.
When you hover over an NFT and see the 'Buy Now' button, it indicates the option to purchase immediately.
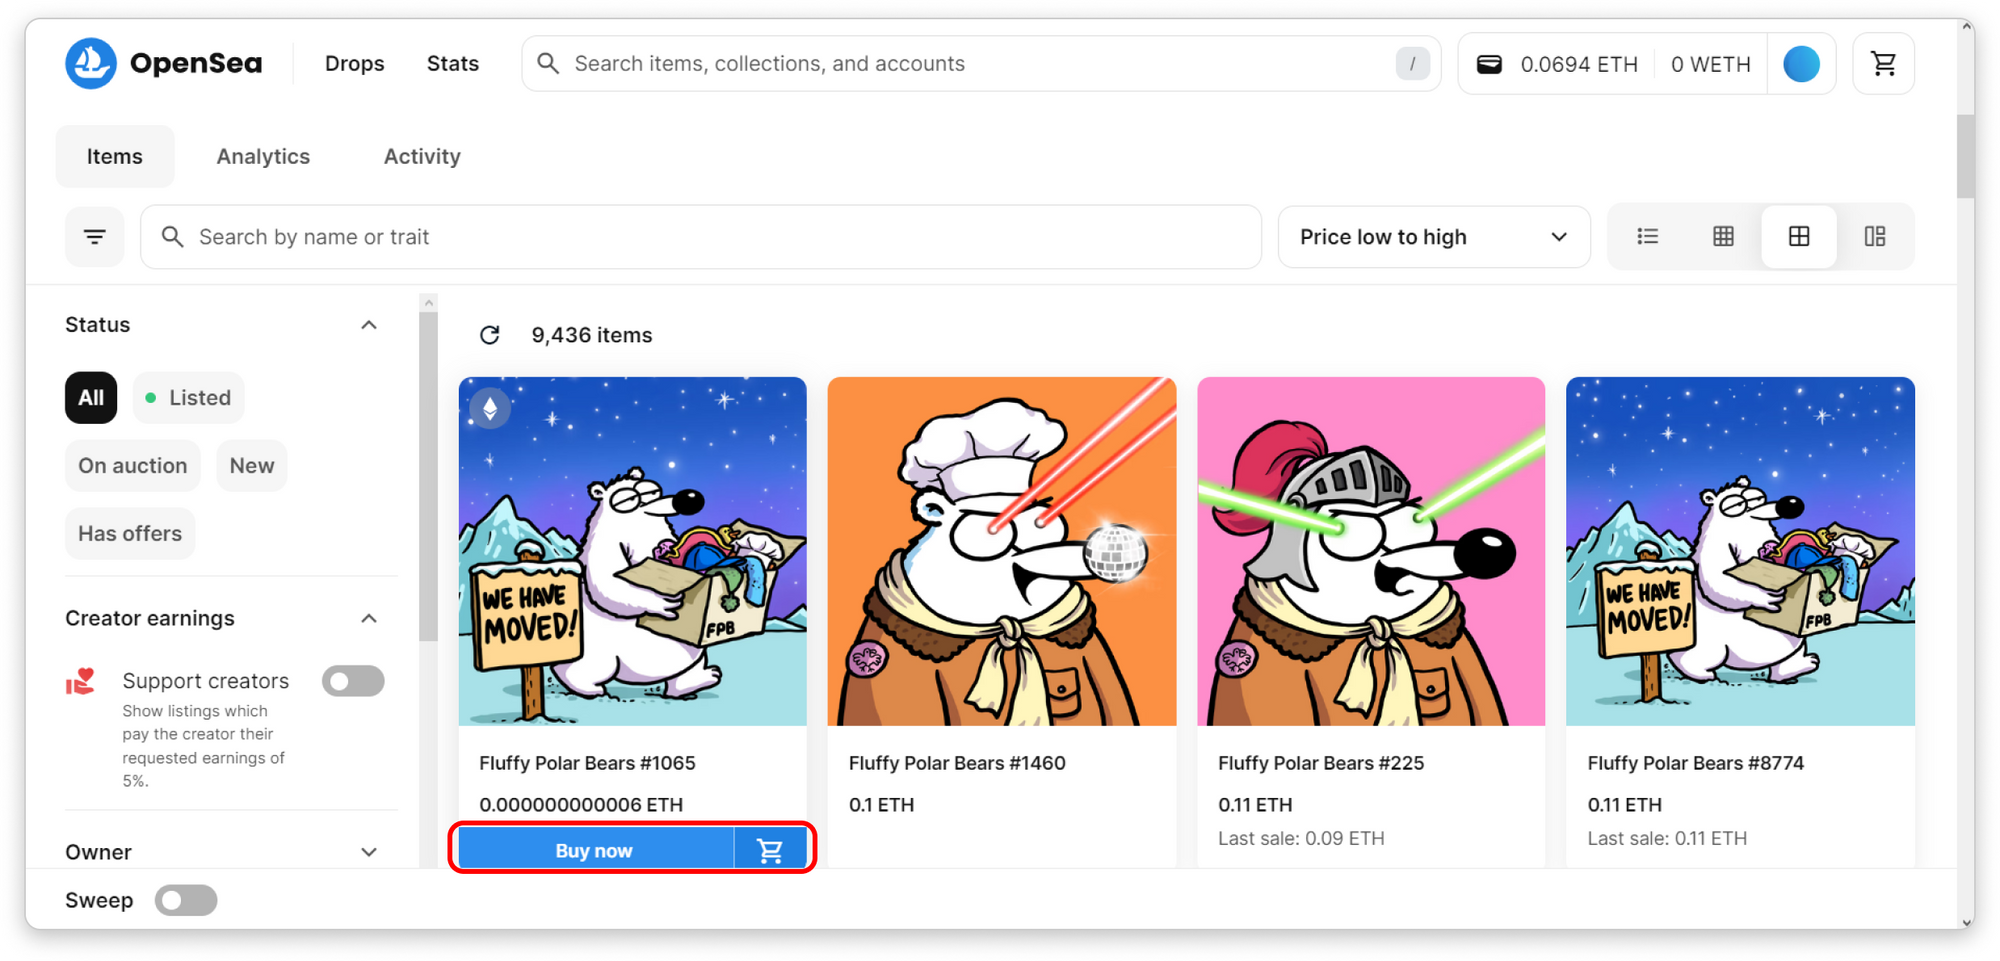
Upon clicking, a pop-up should appear, prompting you to confirm your purchase, as shown below.
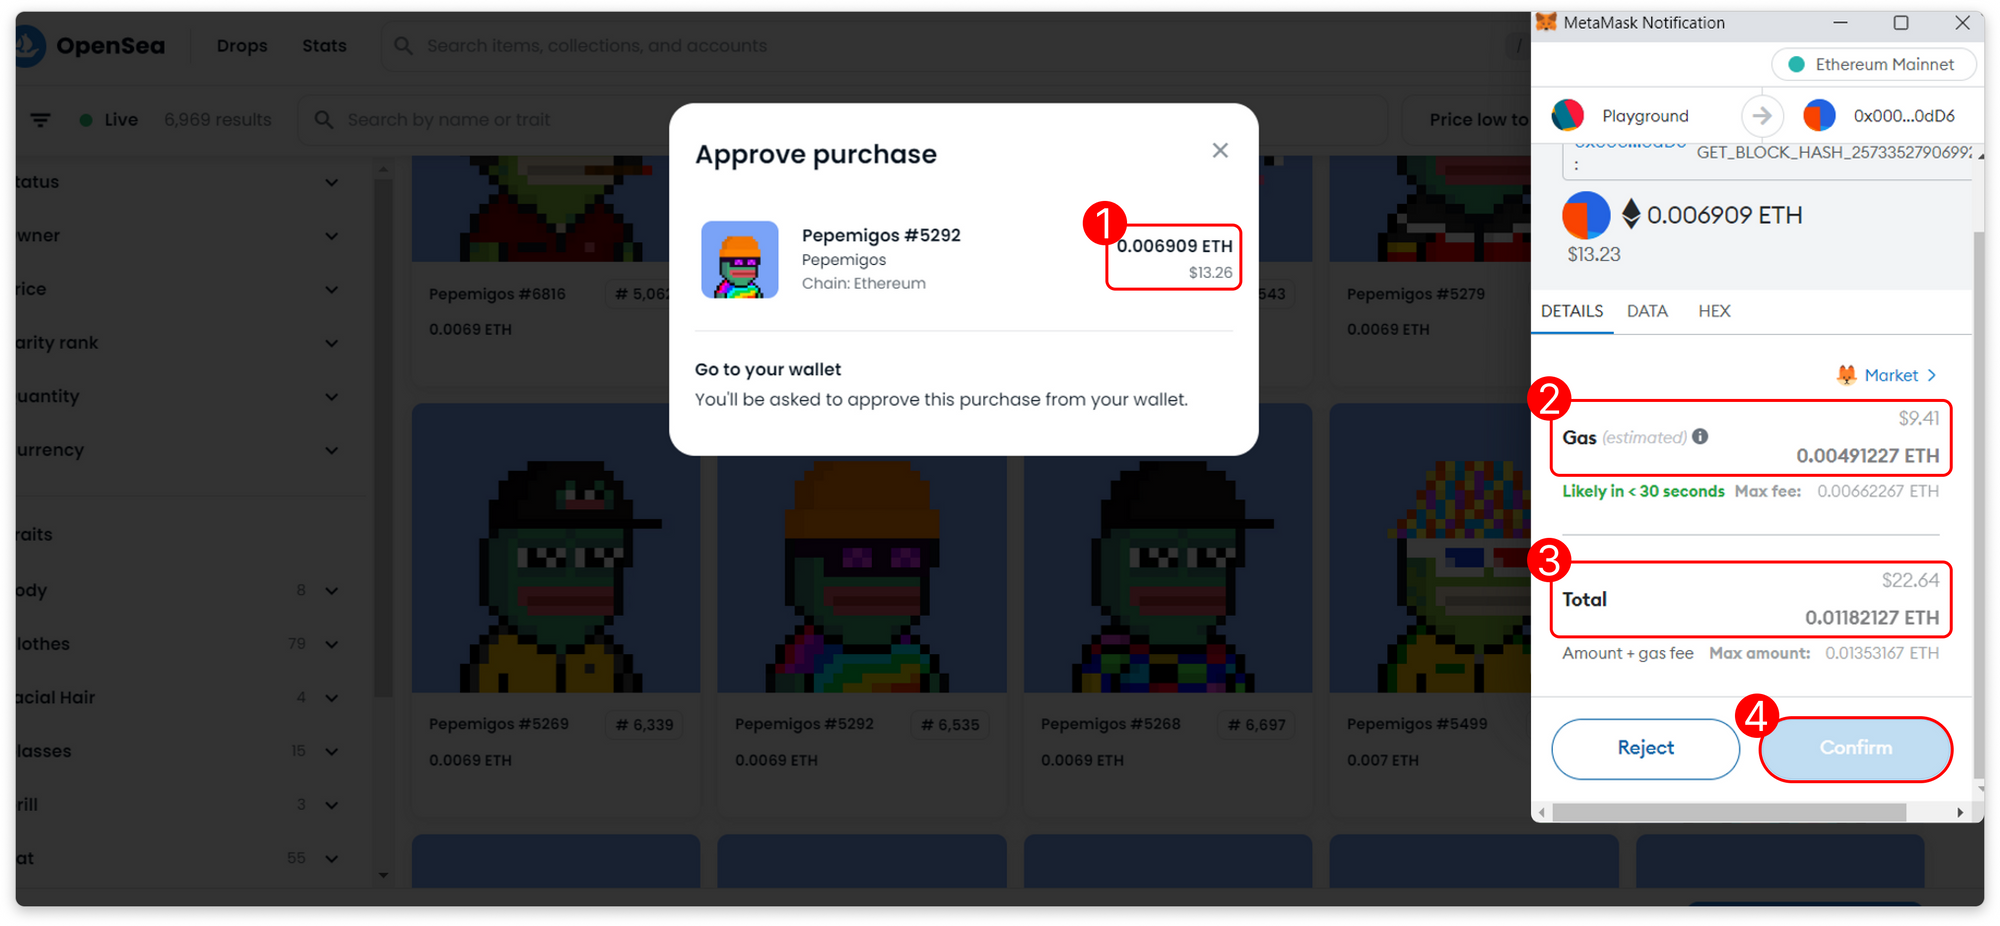
Let's break down the transaction, following the MetaMask screenshot above:
- This represents the price of the NFT you're purchasing.
- This is the Gas fee you need to pay for this transaction.
- The total amount you're spending on this transaction, calculated as NFT Price + Gas fee = Max amount (0.006909 ETH + 0.00491227 ETH = 0.01182127 ETH), equivalent to $22.64 as of the screenshot.
- Once you click 'Confirm', the transaction will enter a pending state for processing.
Checking the Transaction Status:
Since transactions aren't instant most of the time, you can review your MetaMask activity to track the pending transaction, as shown in the screenshot below.
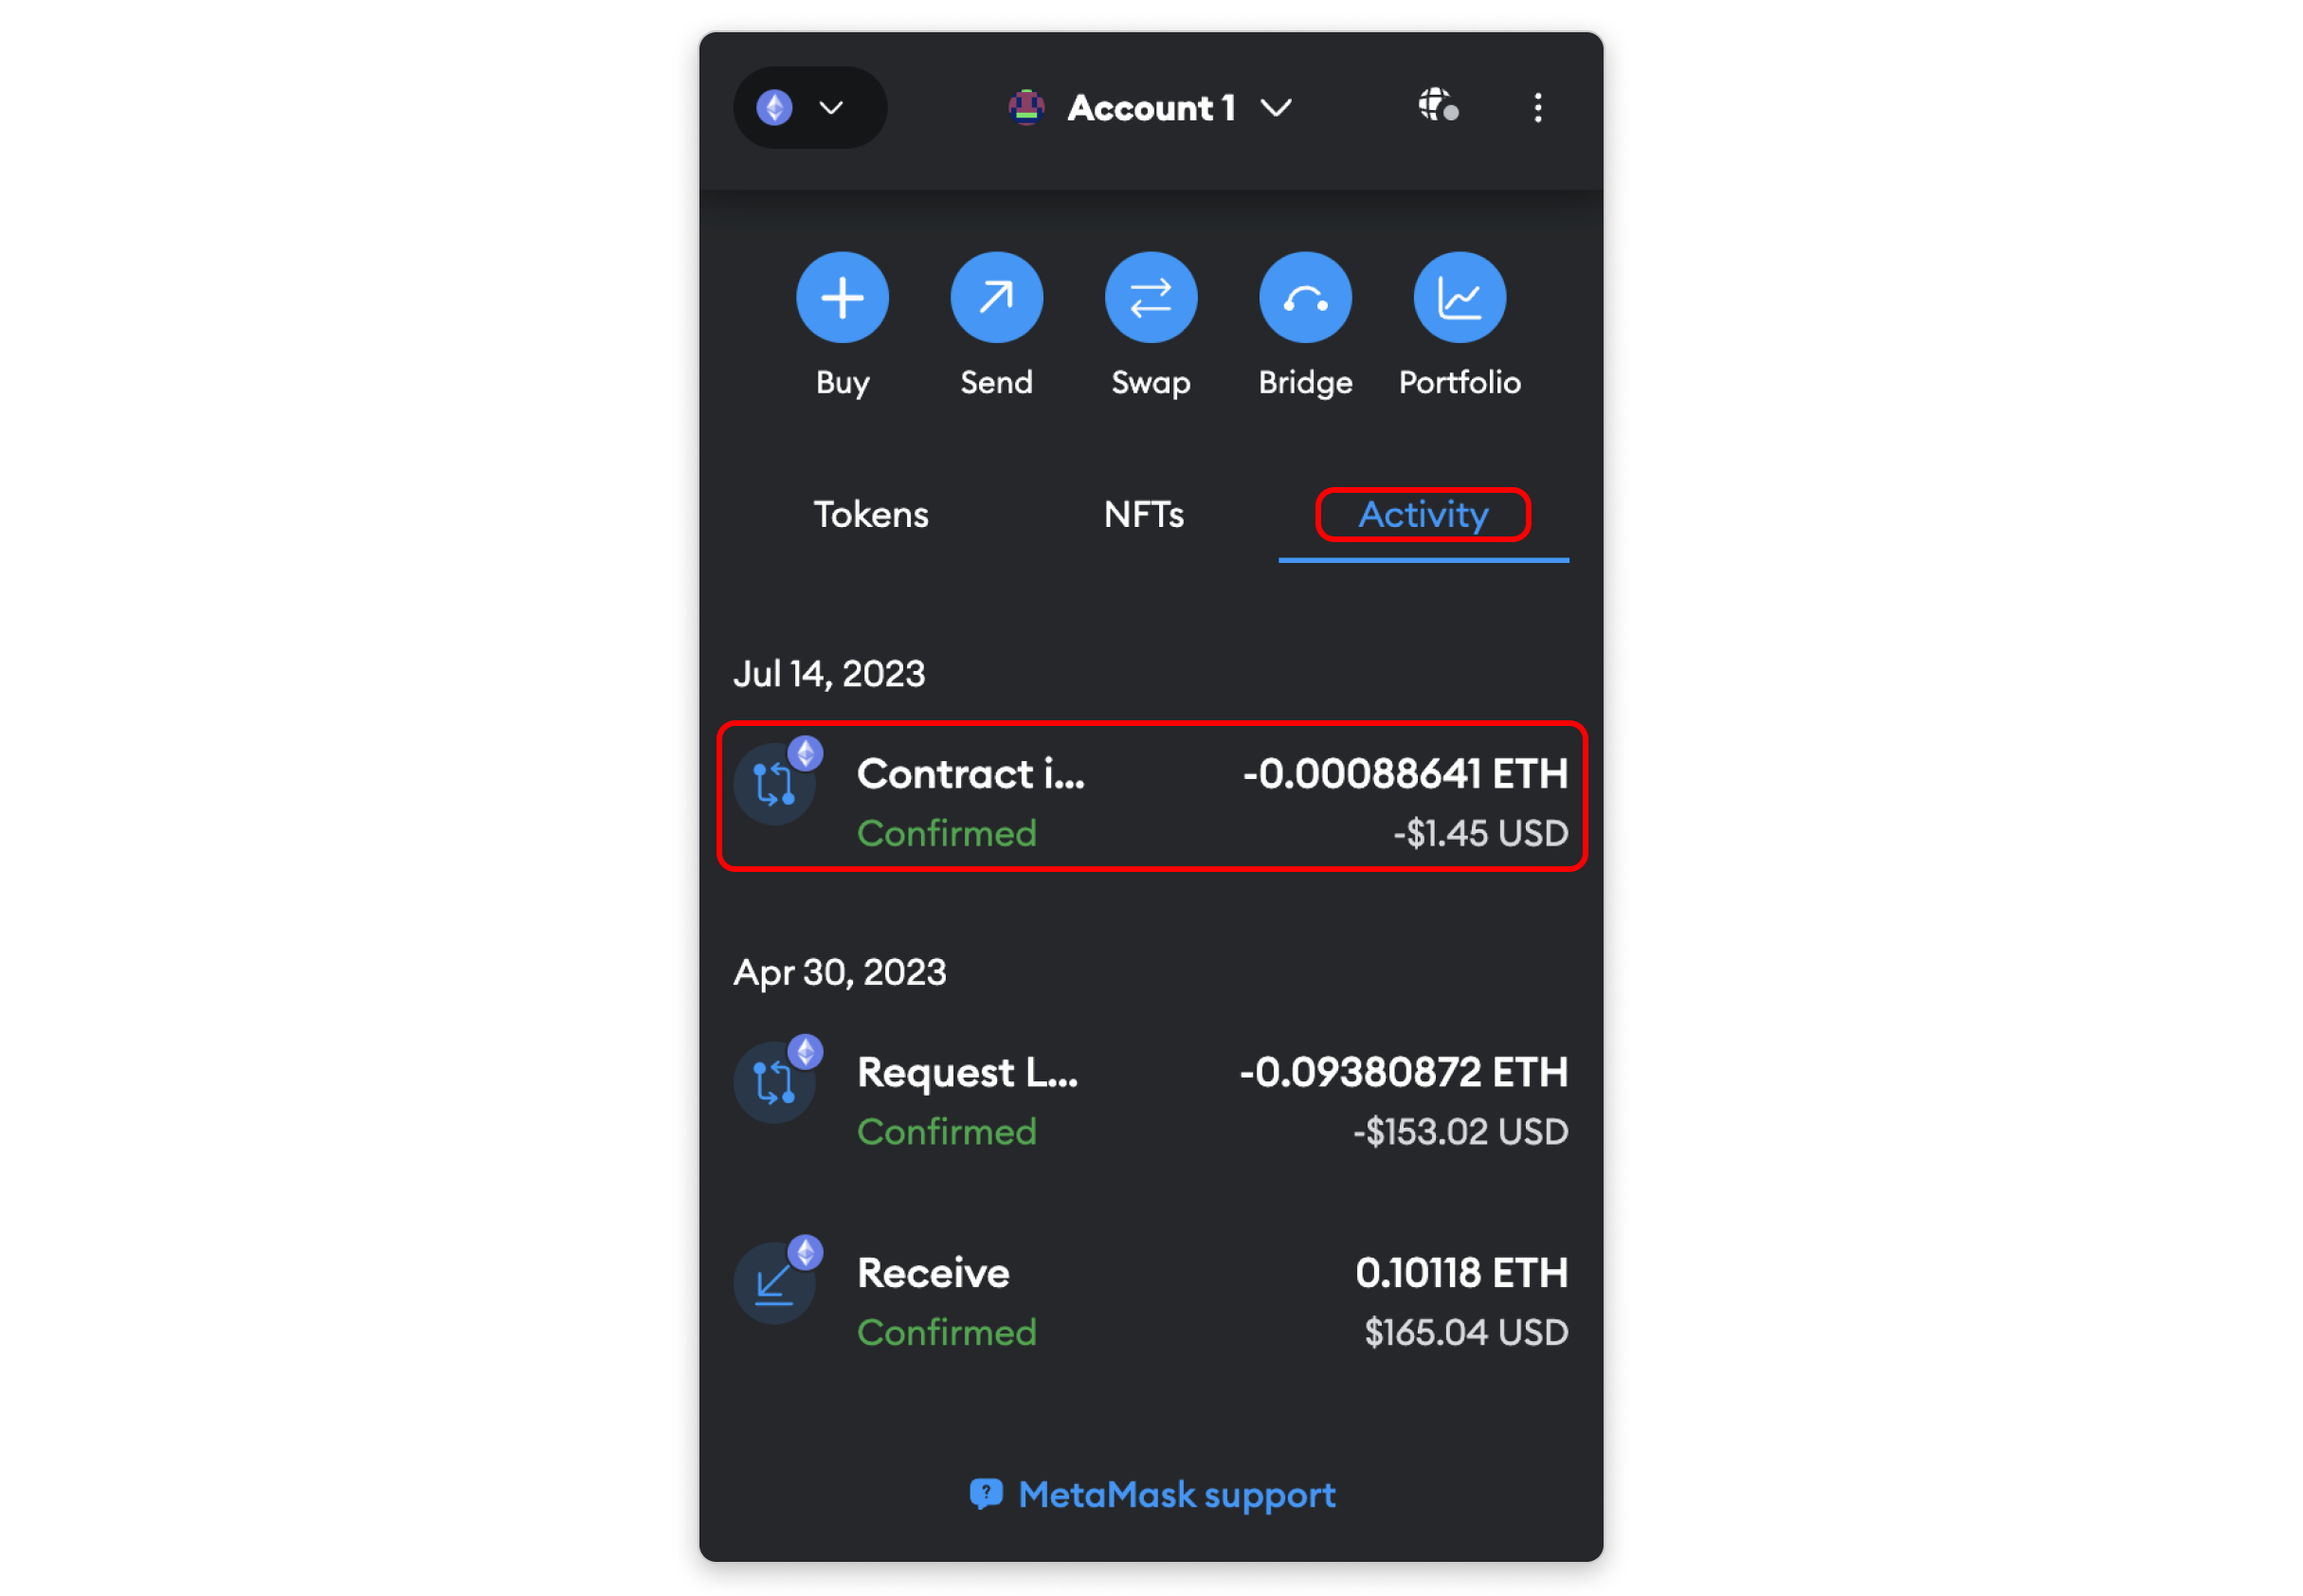
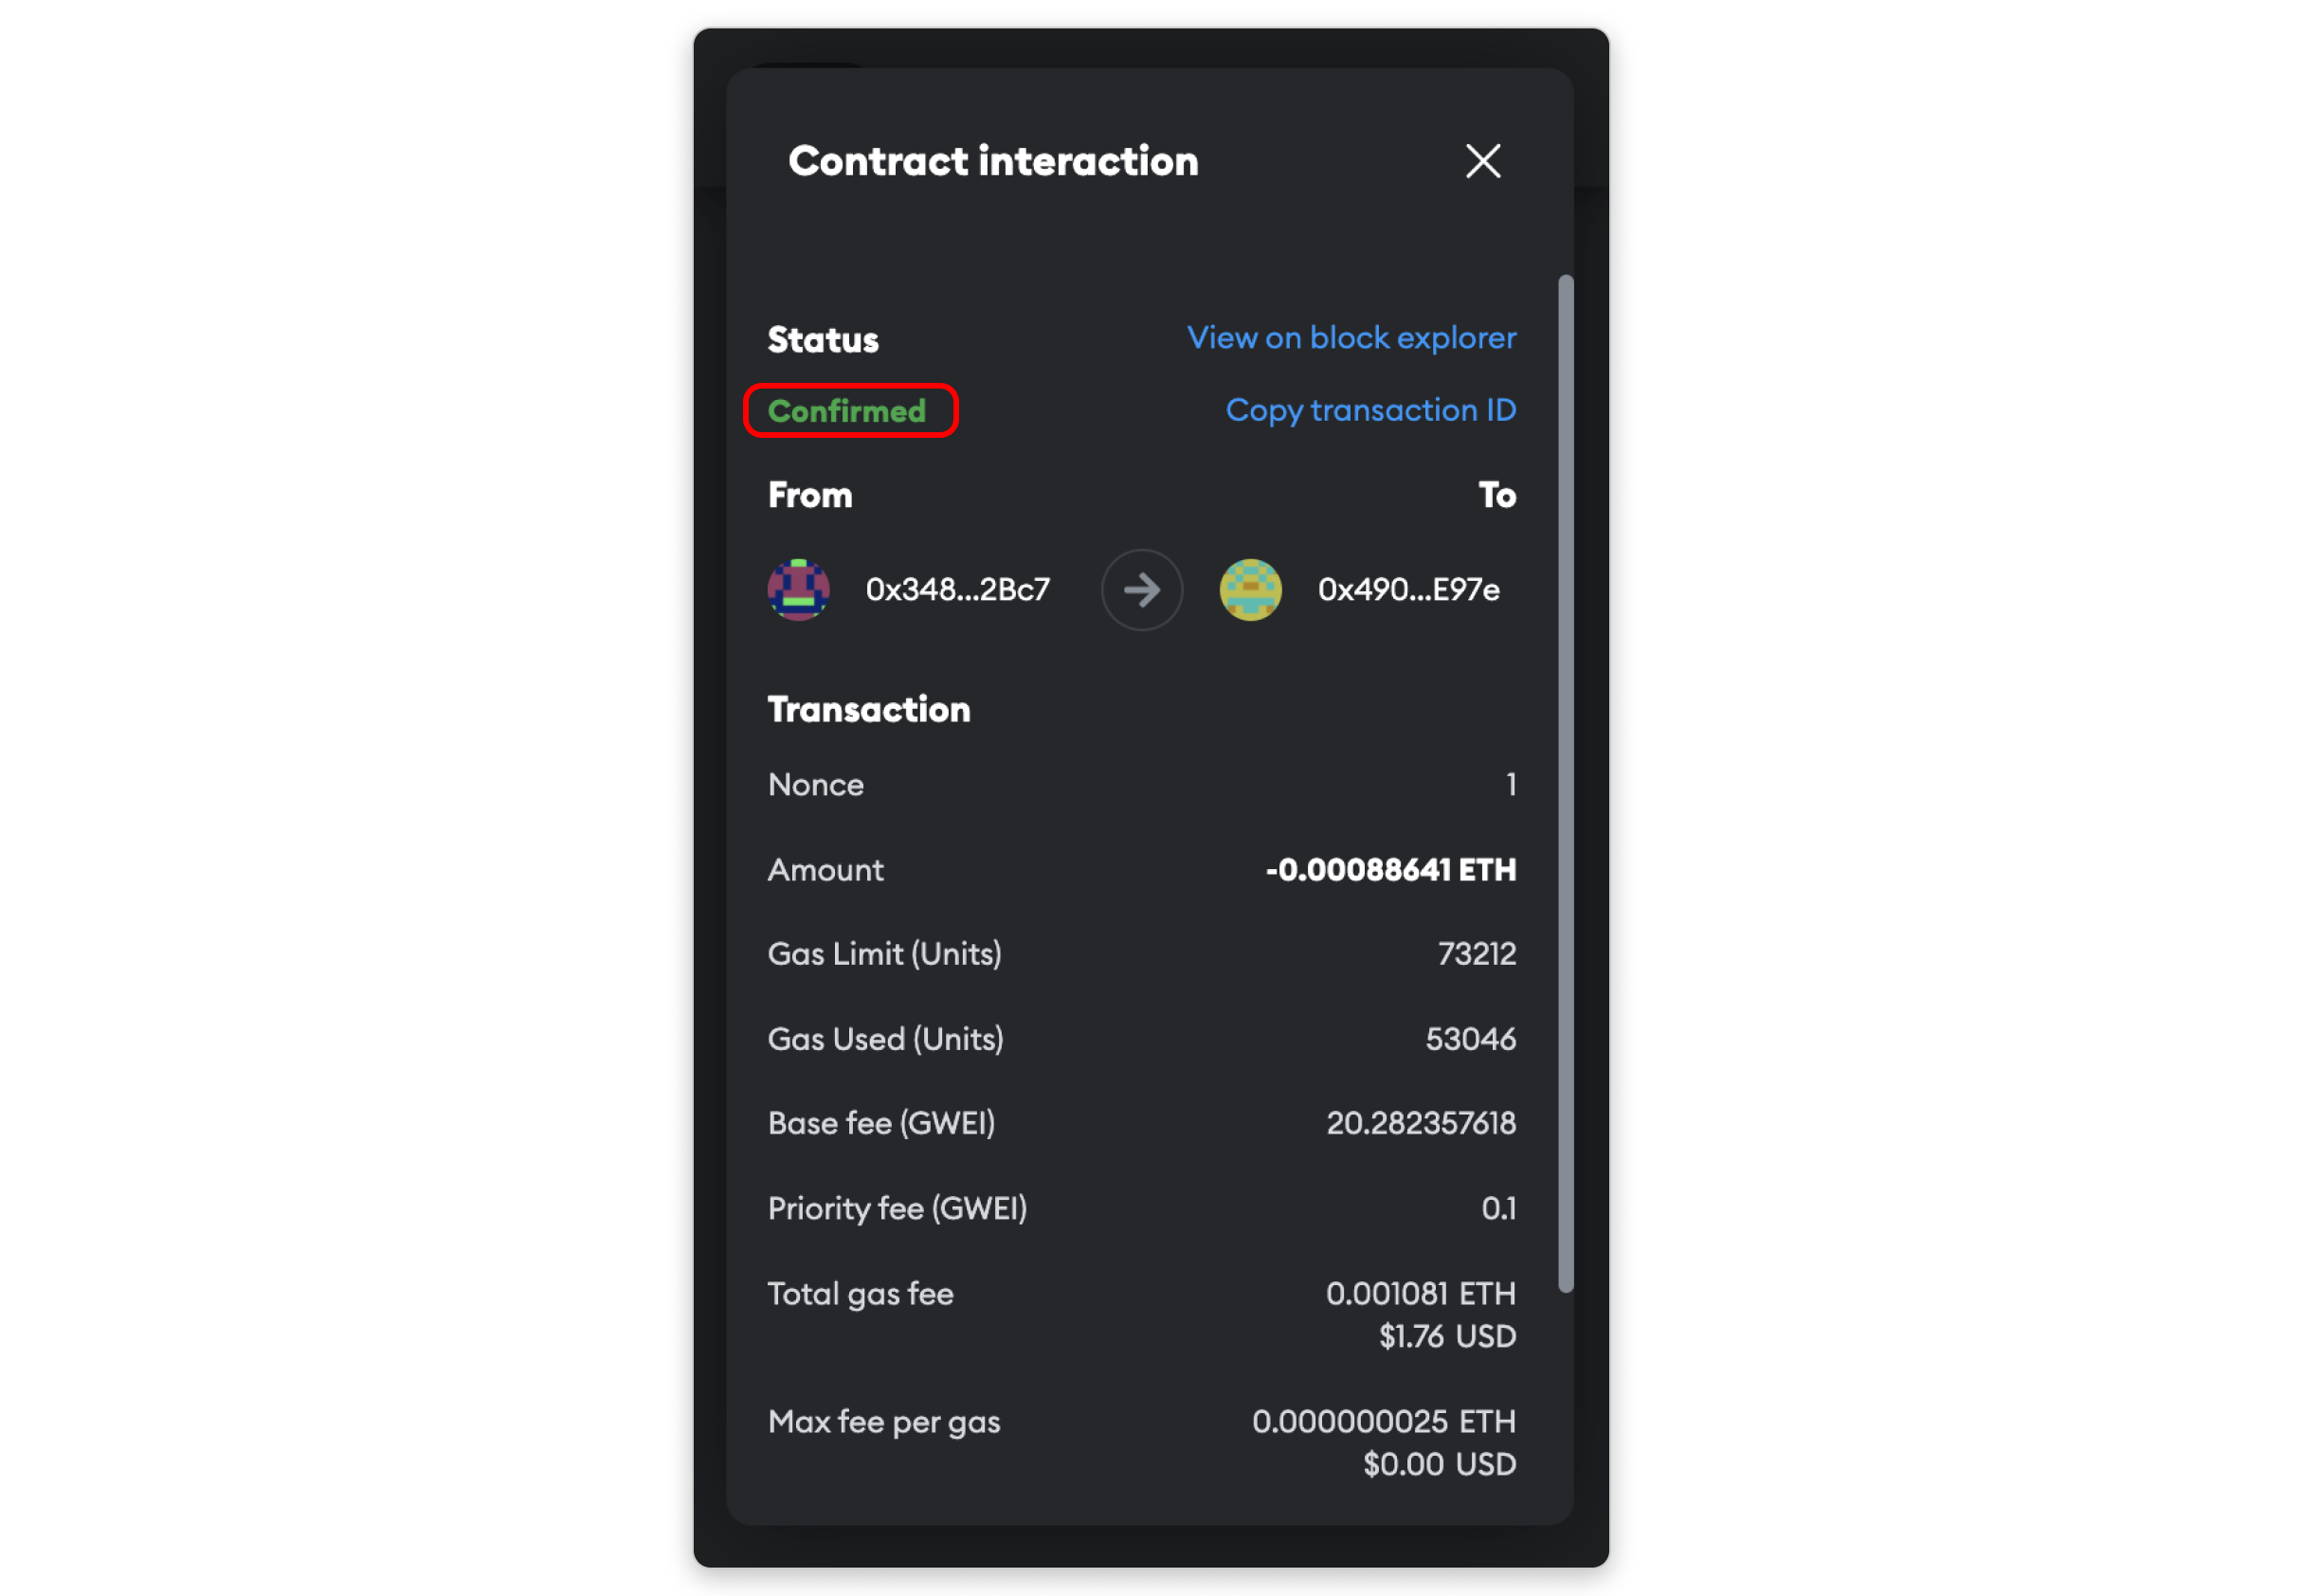
Click on the latest transaction you've completed, and you will see that the status is confirmed.
3. Review NFT transaction
Sometimes, you may need to review the details of your transaction, which can be particularly helpful if you've forgotten the specifics over time.
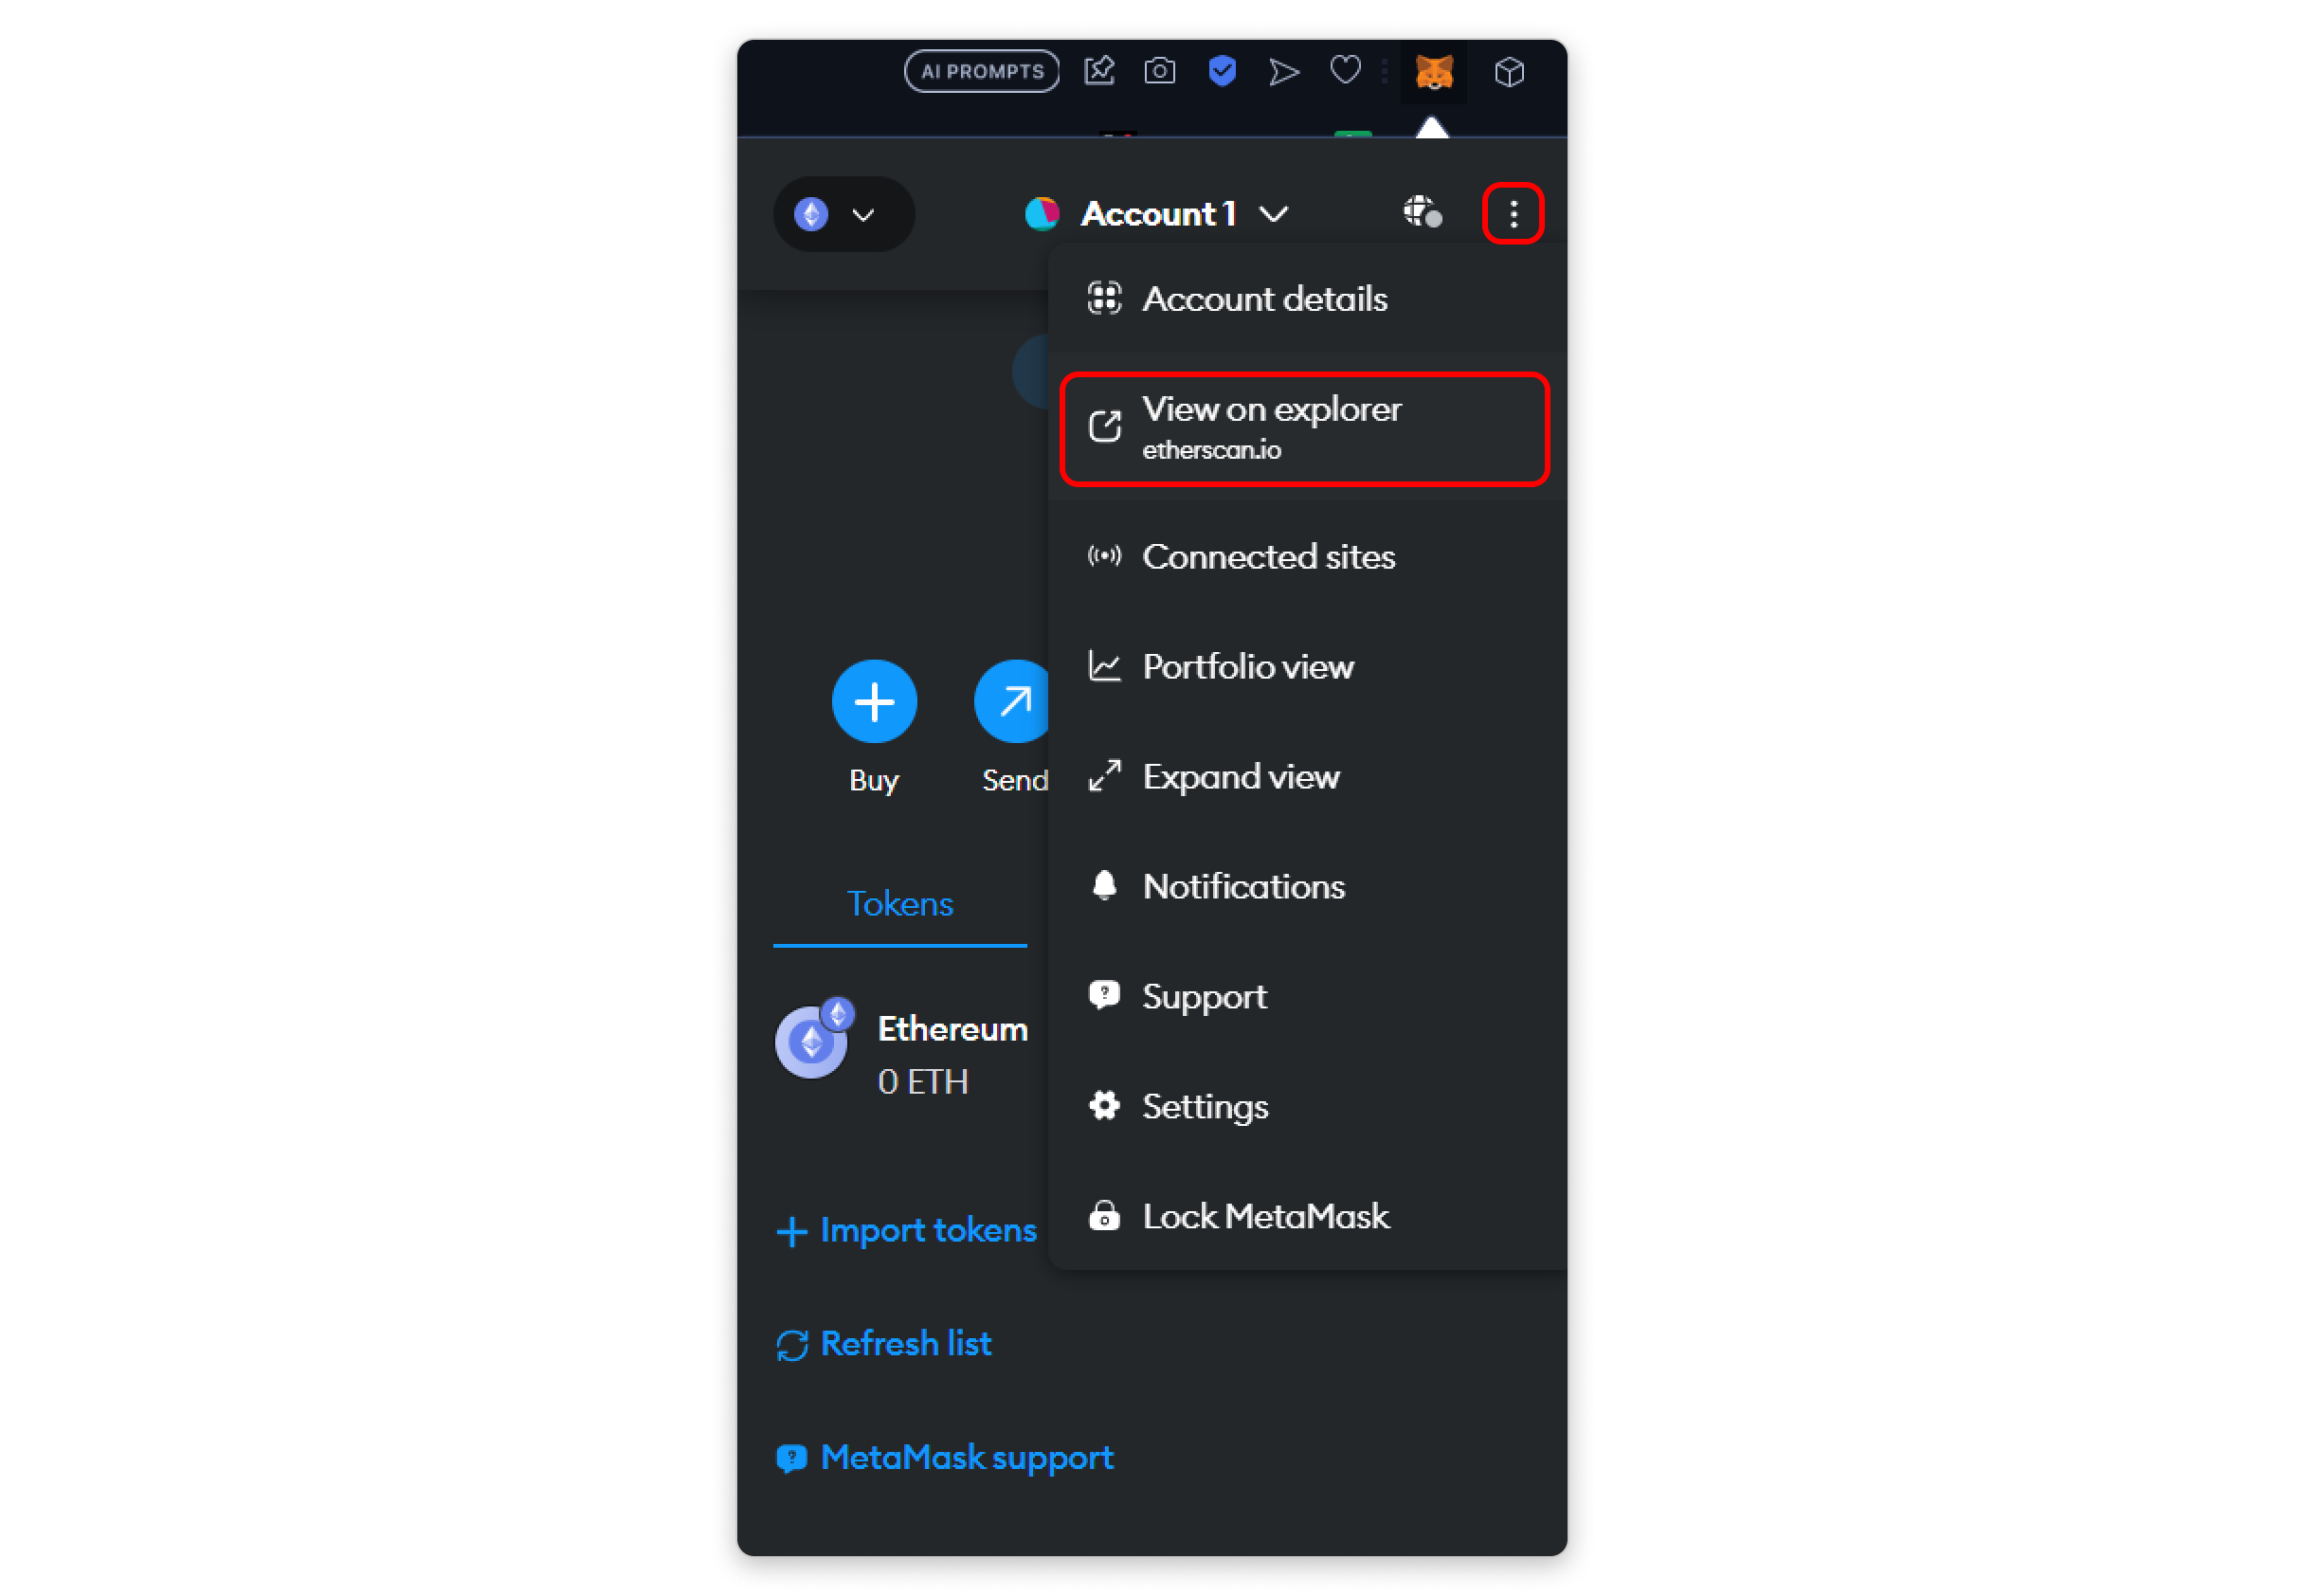
To do this, you can access your address details on Etherscan. Here's how:
- Open Metamask.
- Click on the three dots menu (ellipsis icon).
- Select 'View on explorer.'
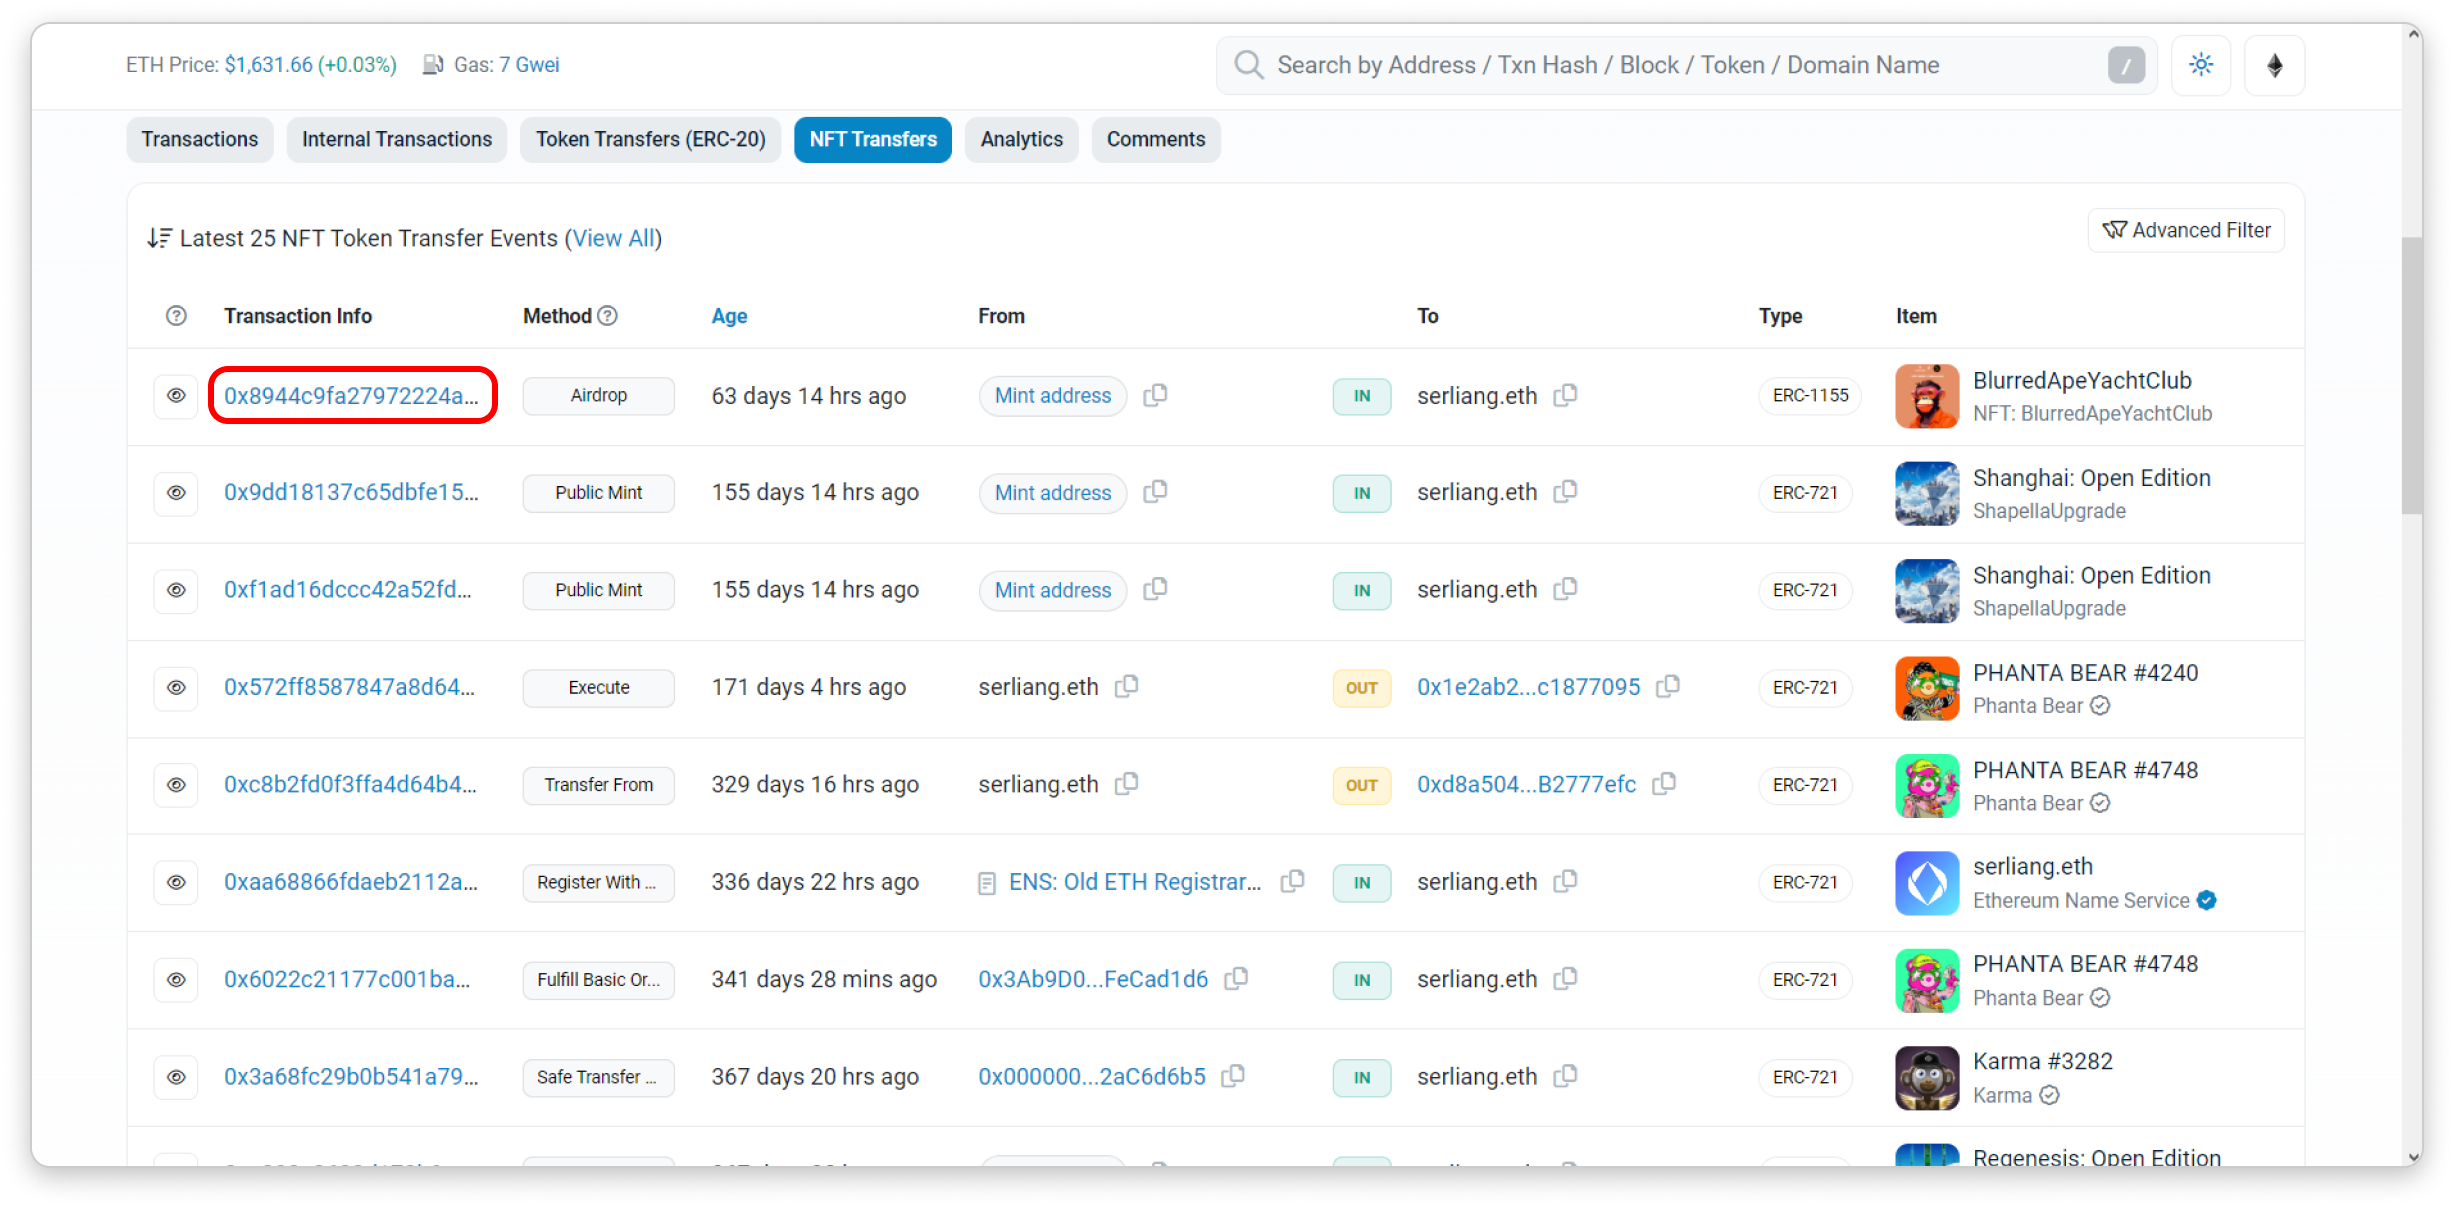
After clicking, you will be directed to your address page on Etherscan. Next, click on 'NFT Transfer'.
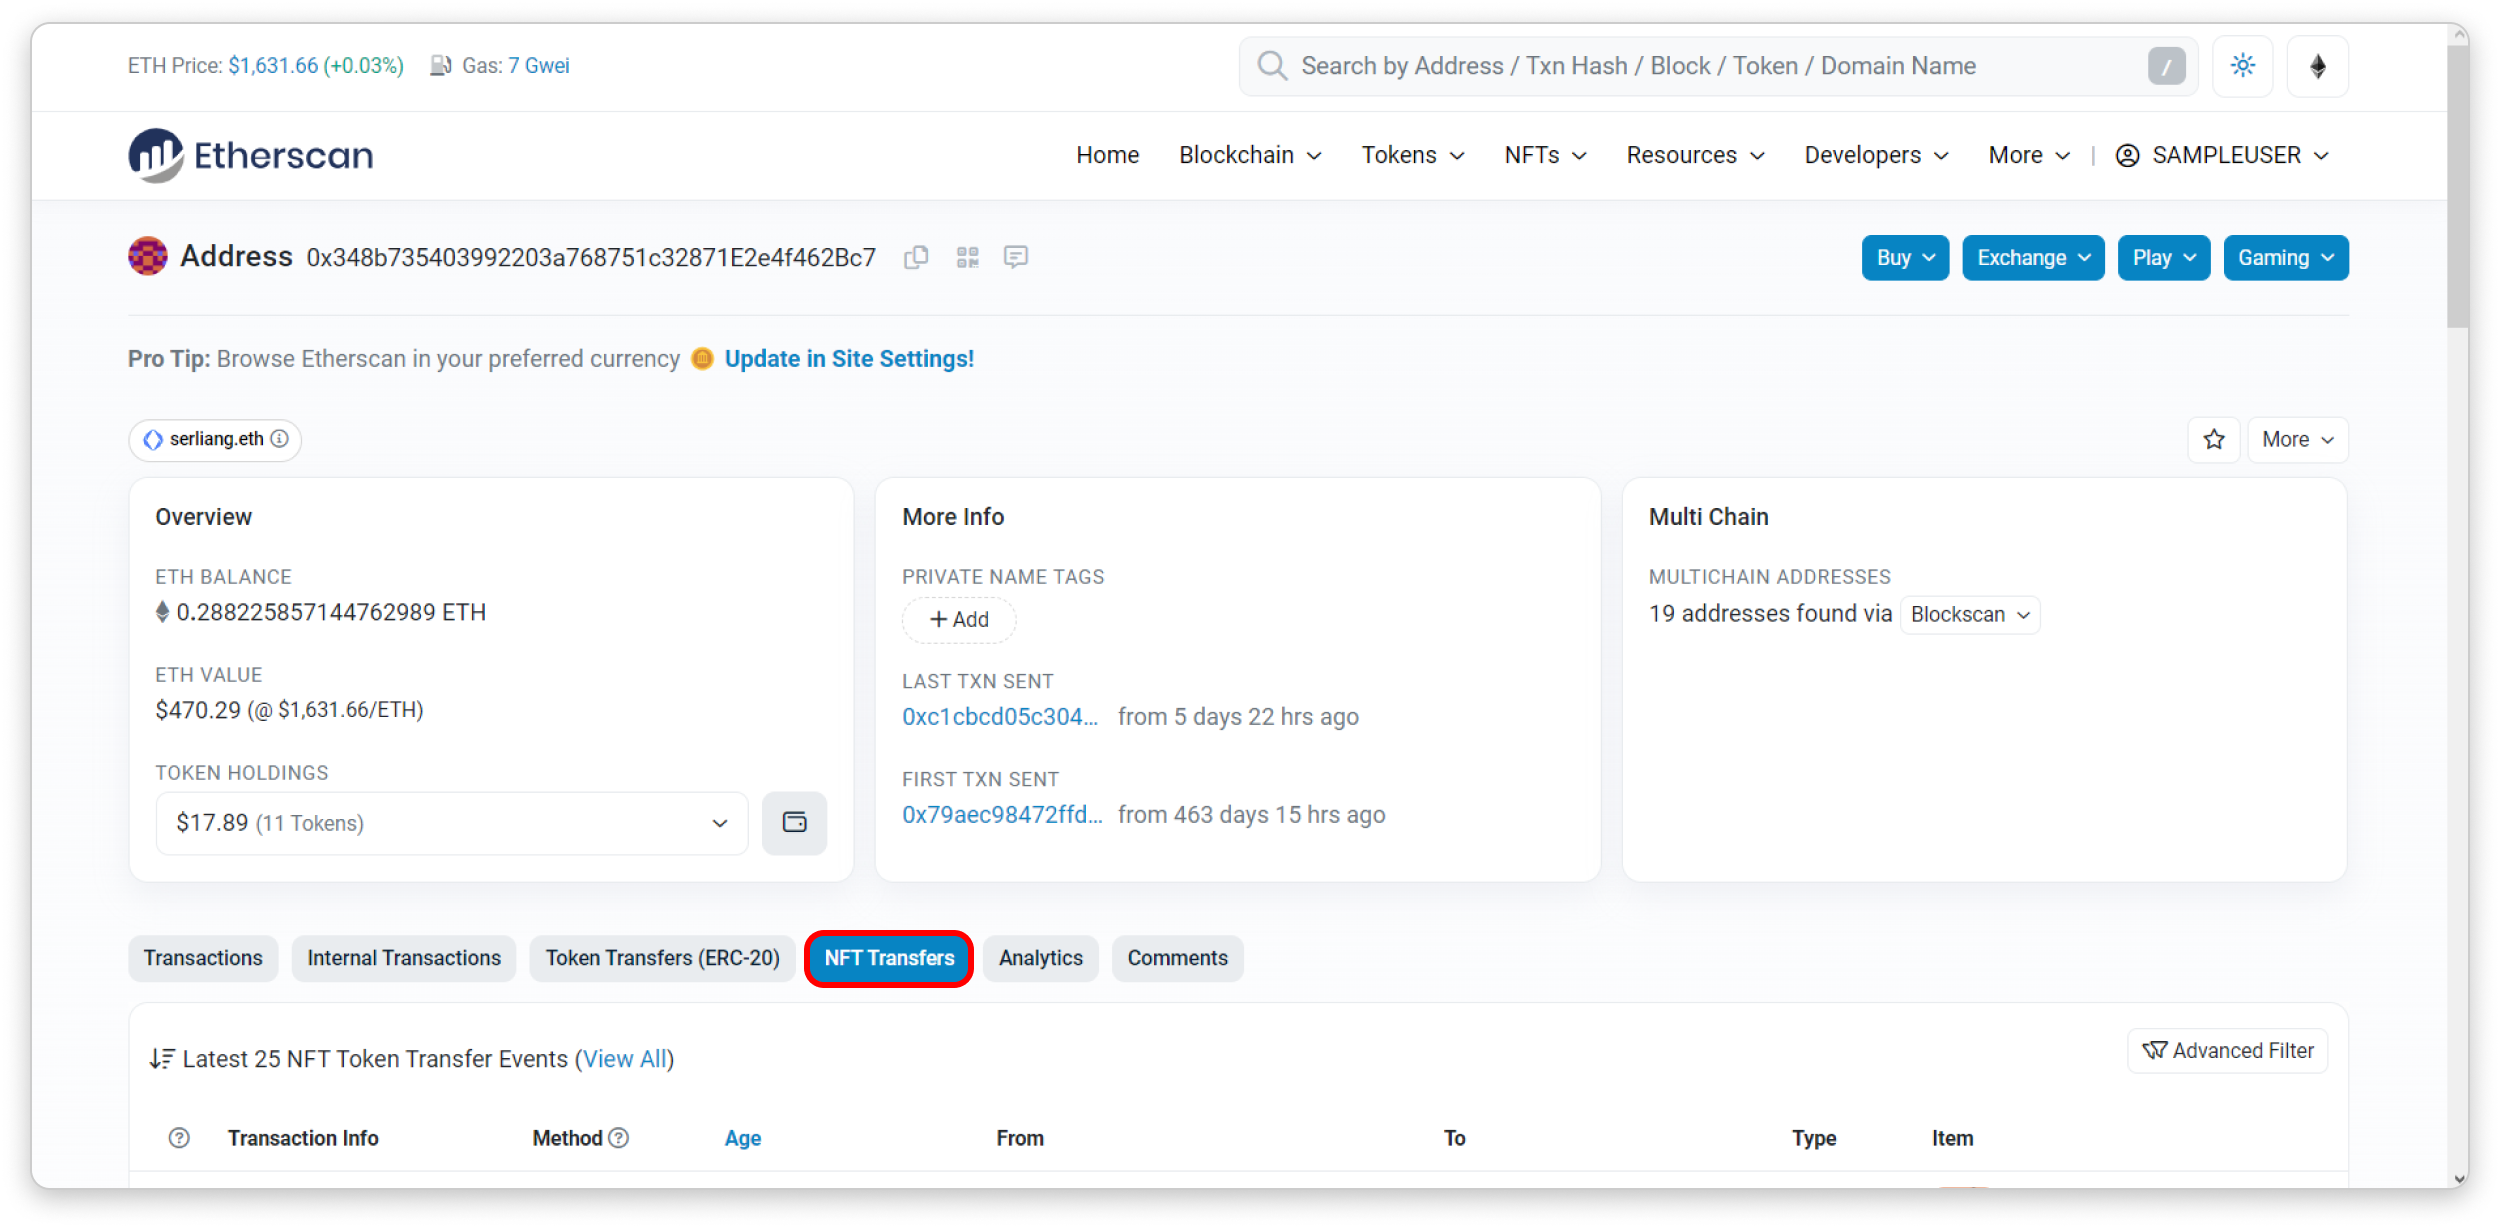
Then, you will see all the NFT transactions you have completed. To check the details of the specific transaction you conducted earlier, click on the information for the first transaction.
In the transaction details, you will find all the information you need on this page:
- The previous owner's address.
- Your address.
- The NFT you purchased.
- The price you paid.
- The gas fee you paid.
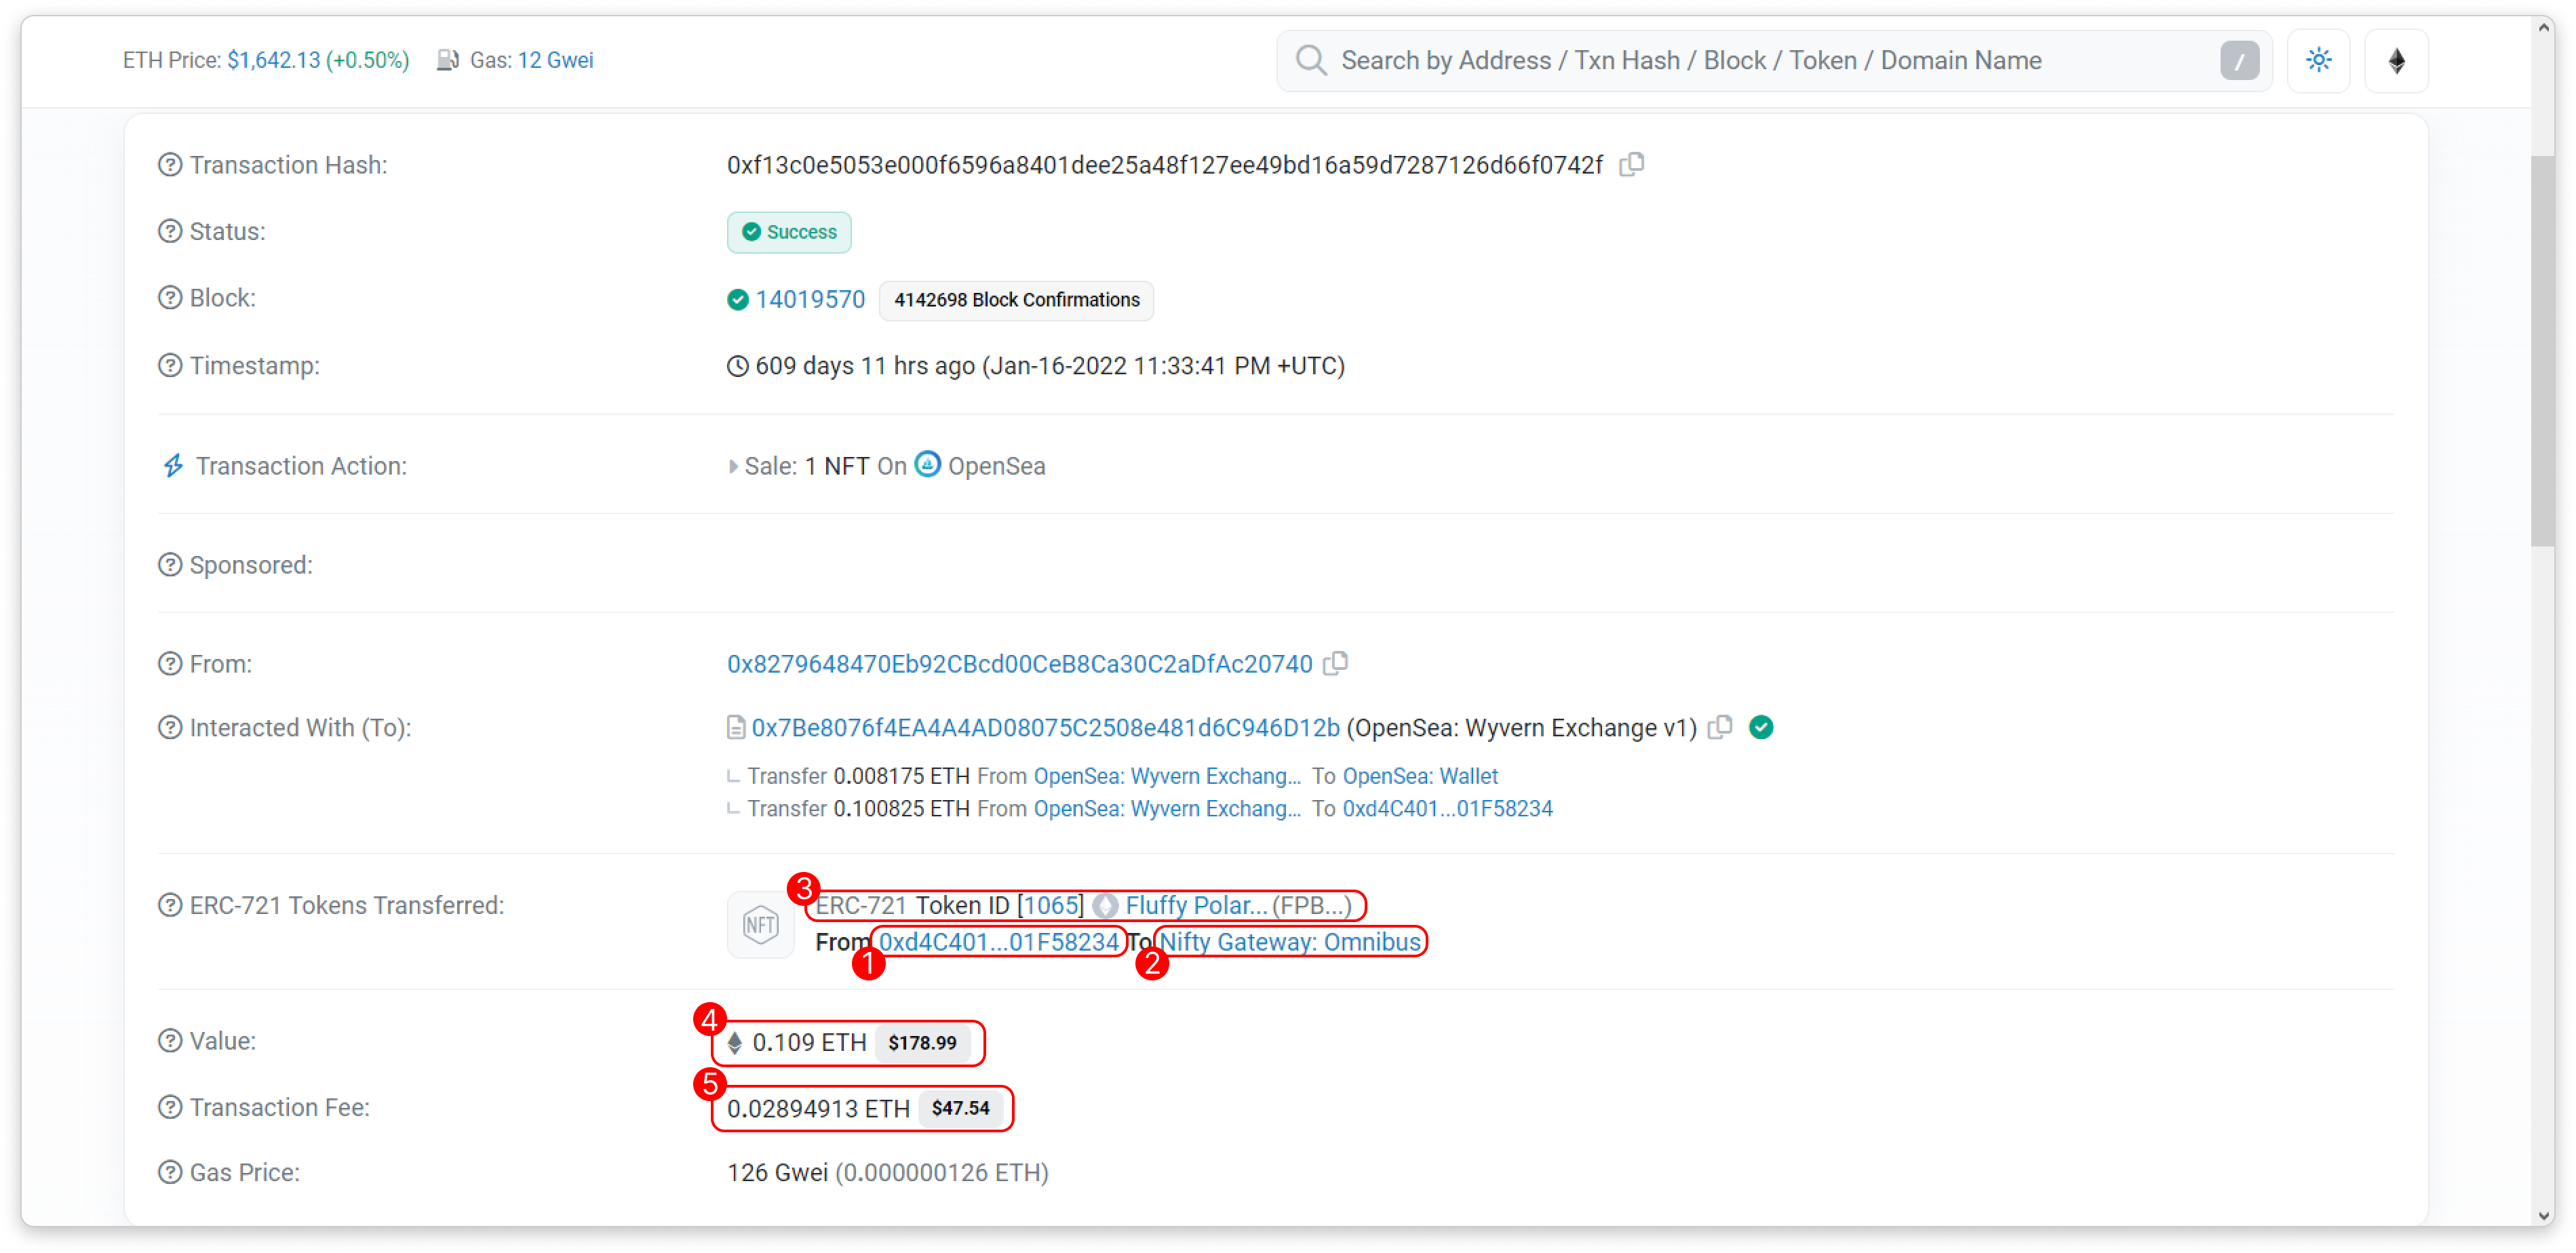
In short, you have purchased the NFT from the previous owner for a price of 0.109 ETH, and the transaction incurred a gas fee of 0.02894913 ETH.